|
|
|
|
|
|
Not a member? Join Today to see why so many say they are Proud to be a Venturer!
|
|
| Fork Oil Change & Steering Head Bearings |
|
Author: Peter Behm Views: 13412 Votes: 11 |
|
 2006 Tech Contest Winner 2006 Tech Contest Winner
Fork Oil Change & Steering Head Bearings My main focus on this project was to change the fork oil by removing the Forks. Also shown is what's involved in removing the fairing, tightening the steering head bearings and also repacking the bearings.
First step is to have the bike on a lift so the front wheel is off the ground. You'll want to begin by removing the outer fairing and windshield as described here.
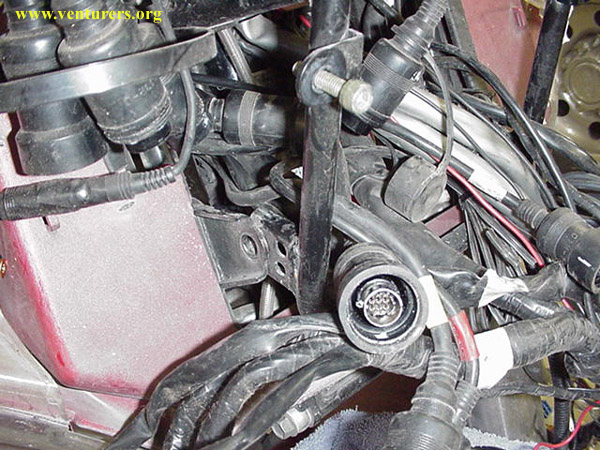
Once that is off the headlight assy can be removed. This is accomplished by removing the two hex screws on both sides at the top and also the two hex screws on the lower left that hold the headlight adjuster.
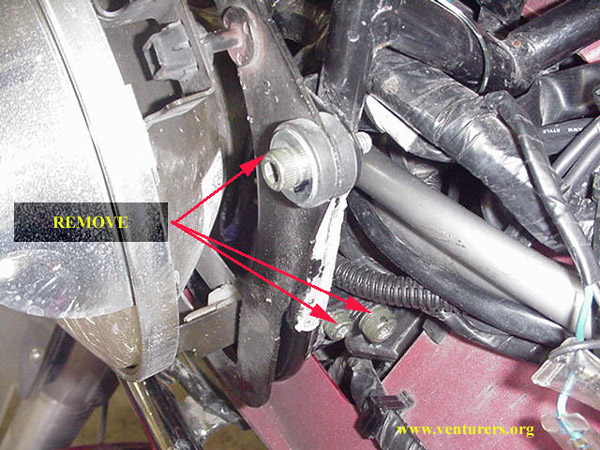  The plug going to the headlight will just unplug by pulling backwards.
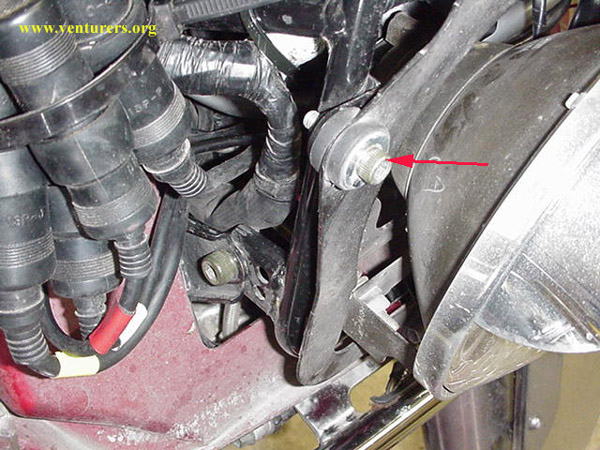
In the picture above the lower hex screw also needs to come out but not for removing the headlight.
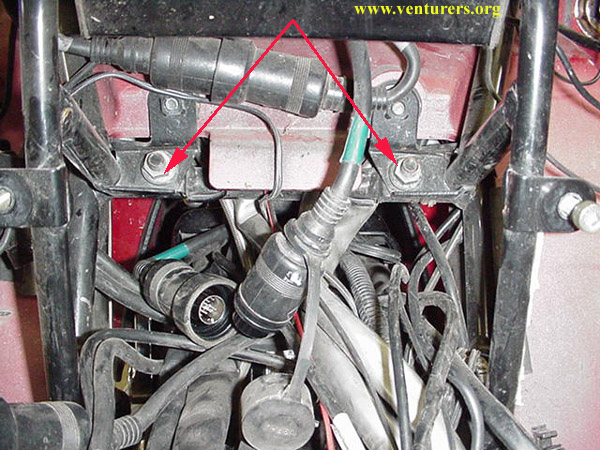
The next step is easier than it looks, and that is unplugging all the needed wiring connections to remove the inner fairing. Here are a couple of pics of a stock bike showing the connections and strapping points. If you are like me and have extra relays and wiring in here things get a little more complicated.
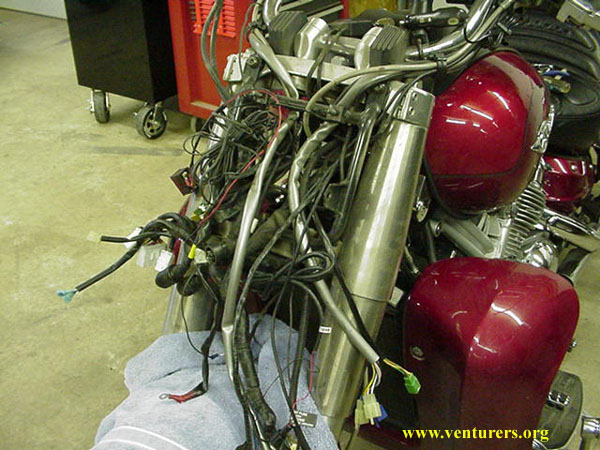
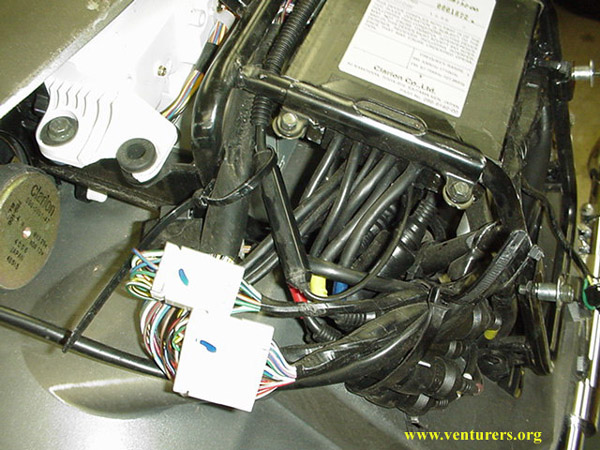 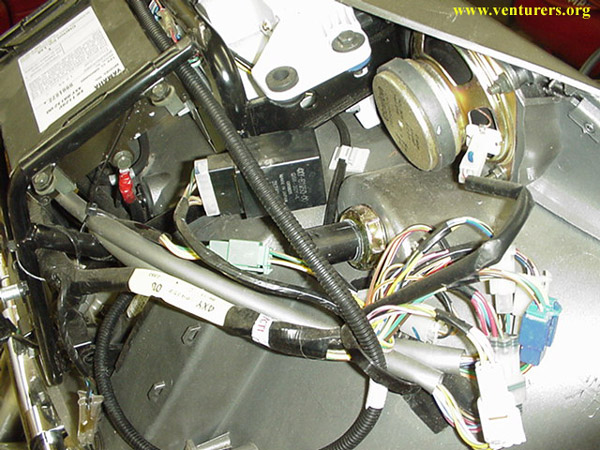 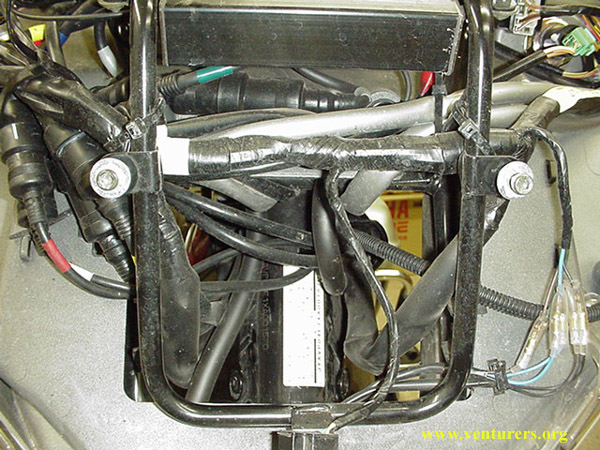 One thing that will help a little is Yamaha wraps white electrical tape on most harnesses where they are strapped. You can see a couple examples of this in the pictures above. Once everything that needs to be disconnected is, bring the wires through where the headlight mounts. This will make it a little easier to pull the fairing and bracket off. Not the best pic but something like this.
There are two nuts to remove and the bracket and fairing can be removed.
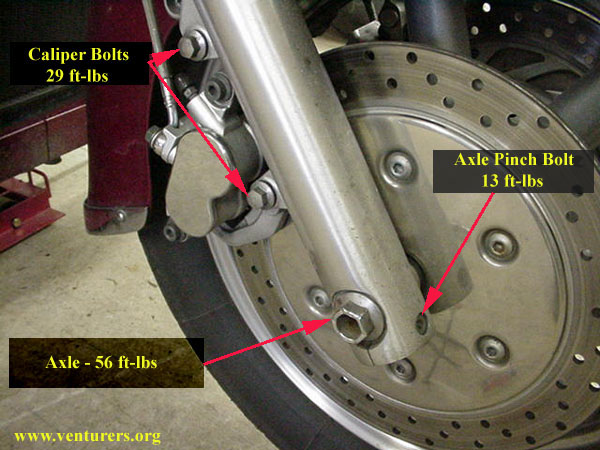
From here my next step was to remove the front wheel and fender. I started by removing the brake calipers (two bolts) and wrapping them in rags and placing on top of the lower fairings. Next loosen the pinch bolt for the axle and then remove the axle.
Carefully lift the fender out once it's loose. You are now able to roll the tire out without having to lift the bike up higher. Now it's on to removing the forks. Start with removing the handlebars. I just removed them and set them on a towel on the gas tank. The little chrome caps on the screws will pop off with a small standard screwdriver. A couple of things to point out here for reassembly. The clamps are marked by a dot and this goes towards the top.
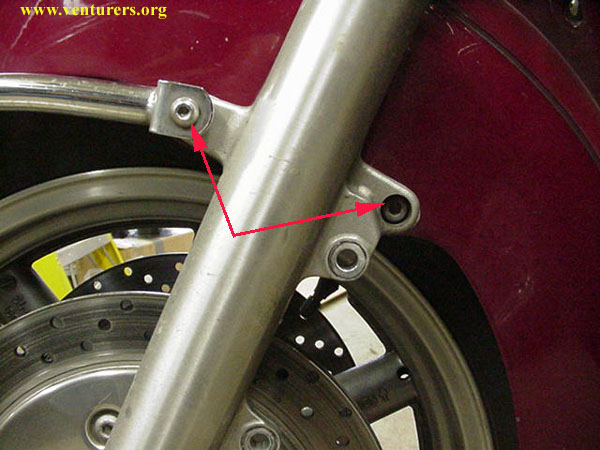
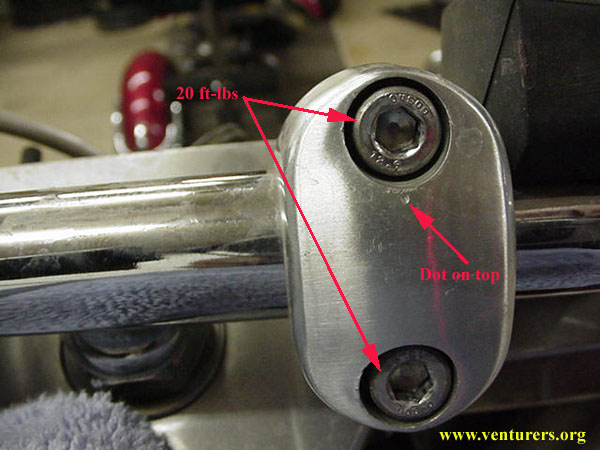 When tightening these you want the top screw tightened up first and then take up the rest with the bottom screw. 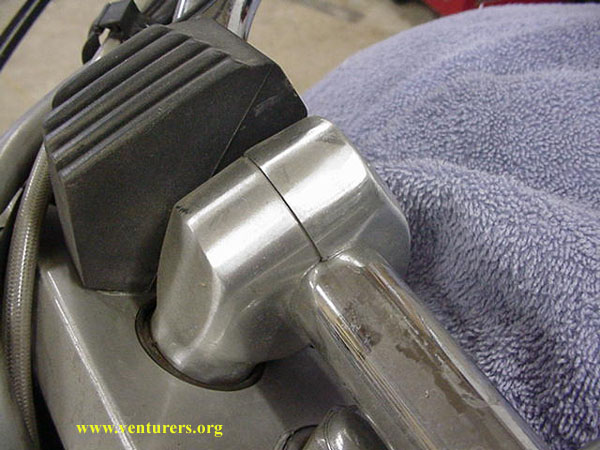 There is also a dot on the handlbars to line them up with the right side clamp. You want to place this at the edge of the clamp, lined up to the seam. I have it away from the clamp in the next pic to show it better. 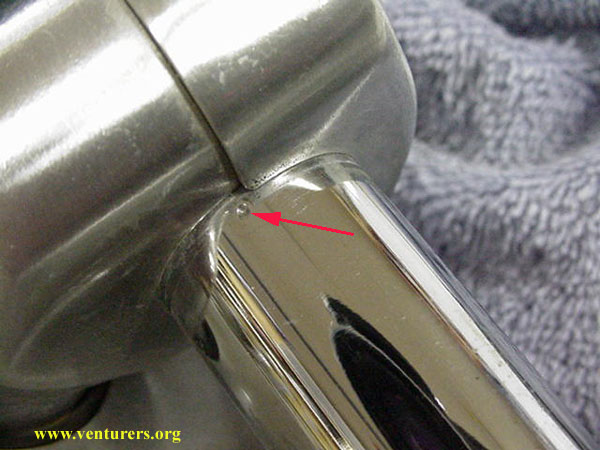 With the bars off, next in line is the top clamp. Remove the steering stem nut, loosen the hex screws on the forks (two on a side) and the two hex screws that hold the bracket for the fairing on. The clamp will then lift up. 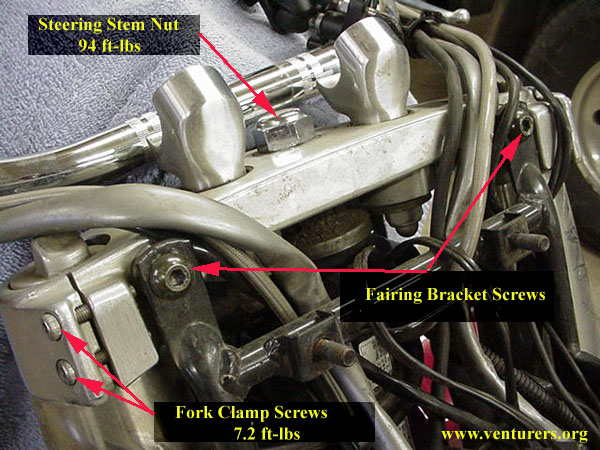 Something to remember when reinstalling the fairing bracket is to make sure the bottom holes are lined up to accept the screws for the turn signal bracket (pic below) before tightening up the top two. If they are not you won't find this out until the end of putting things back together and lets just say a lot of things have to come apart all over again to fix it. I install the screws in the bottom to get everything aligned and then tighten up the top screws. This bracket should have the clutch line running through it and will not be able to be removed. There is plenty of room to work so it's not in the way. 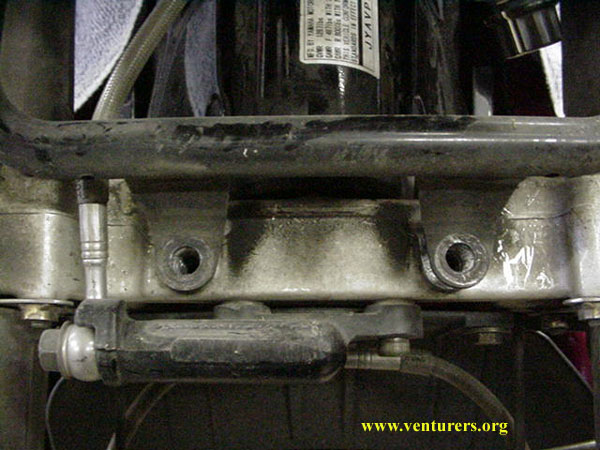 With the top clamp off you can lift off the stainless covers to get at the lower clamp screws. While the fork is still clamped, it is a good time to loosen the fork cap a little. I used a Crescent wrench to do this. Once it's broken loose you can remove it once the fork is off the bike. 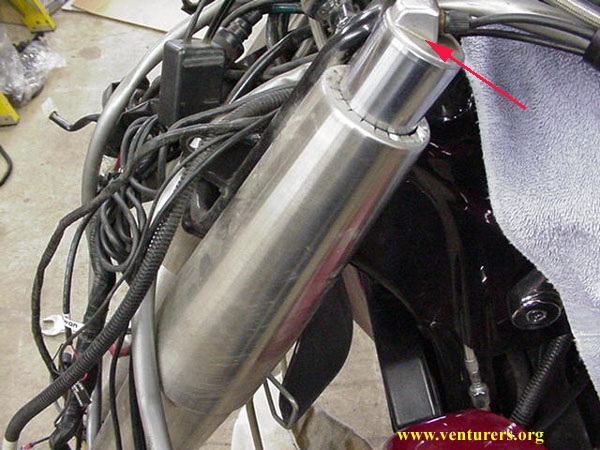 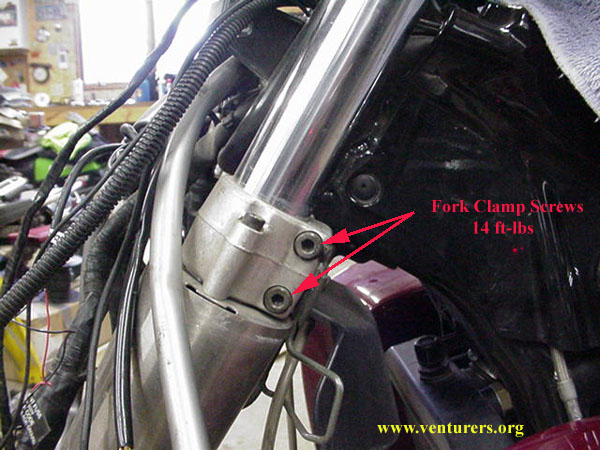 Before loosening up the clamps in the picture above I took a measurement from the top of this clamp to the top of the fork so I knew where to put them for the reinstall as I didn't see anything in the manual to tell me. When reinstalling also make sure to line the schrader fitings toward the back. 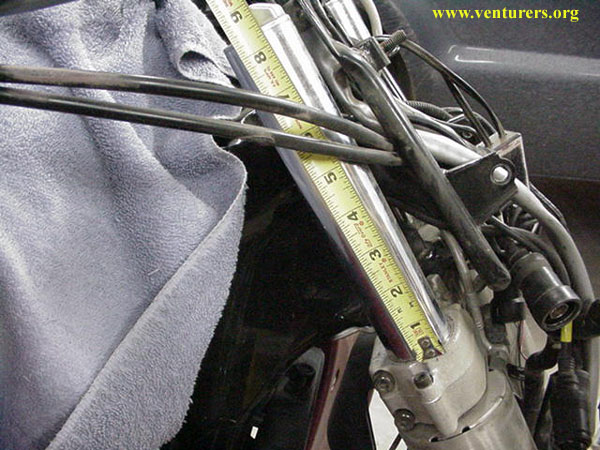 Loosen the hex screws on the lower clamp (two on a side) and the forks should drop out. I had to loosen (a little) the three screws that hold the lower stainless covers on to get mine to drop out. 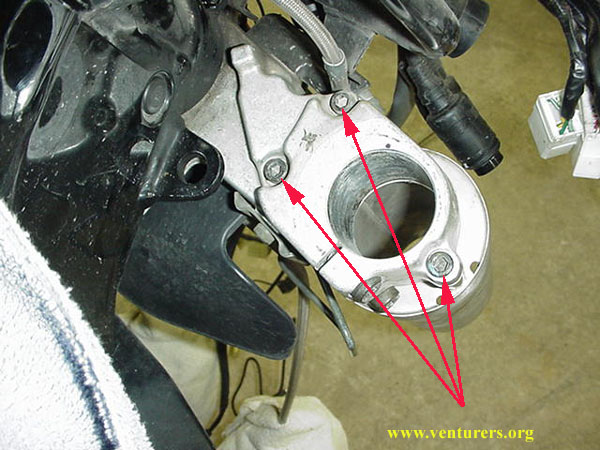 With the forks on the workbench I let all the air out and then removed the cap. There is some pressure from the spring on the cap so be sure to be pressing down when unscrewing it. With the cap off the spring will be sticking out like this. 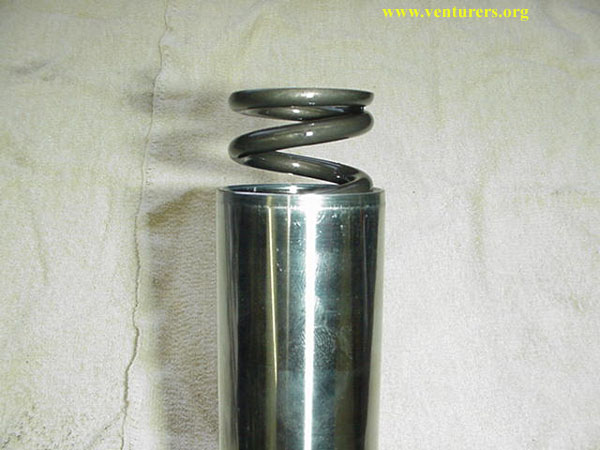 With the cap off I removed the spring and then tipped the fork upside down and drained out the oil. You can also slowly pump the fork to help get a little more oil out of it. This is what 6 year old fork oil looks like. 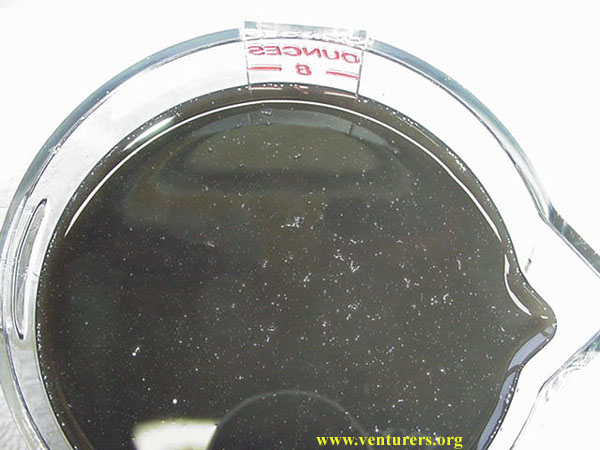 I should have changed this out a long time ago. This is something that Yamaha says isn't needed on this bike. You decide. Compare that to the new oil. 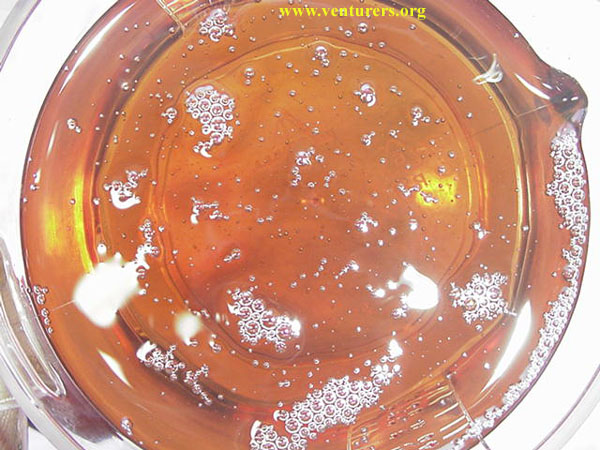 I let them drain upside down for a while and then flushed them with some tranny fluid (no real reason except that it was a lot cheaper than using the synthetic fork oil I had). I put 16 oz. in a fork and then slowly pumped it up and down to work the oil in and then drained again. I did this twice for each fork and after the second time the oil was pretty clean. I let the forks sit upside down for a while to drain out any remaining oil. The manual says to install new 5W oil to a height of 117 mm from the top of the fork with the spring out and the fork compressed. I used 15 w synthetic fork oil to get a little firmer ride. Some recommend using a dual viscosity oil such as 5w 30 so you have thinner oil when it's cold and thicker oil when it's warm. I'll try the 15w without any air and see how it feels. It's now time to reinstall the spring and the cap. I figured this might be a little work as the spring had some pretty good tension to fight. I tried it by hand and couldn't get it started so I put the top clamp in a vice and then tightened the fork in it. 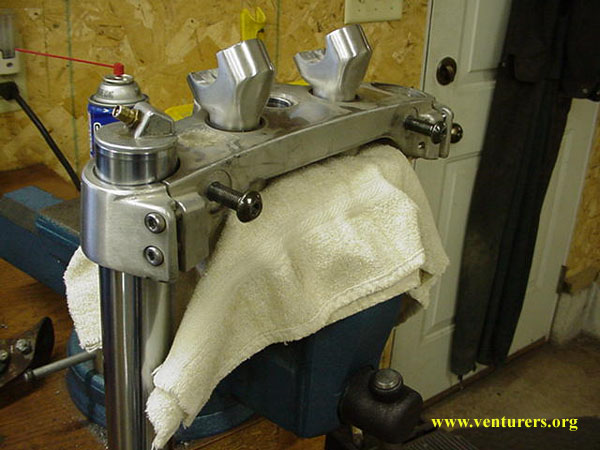 This worked out pretty good as I was able to use both hands on the cap instead of one. With the caps in place and new oil in the forks it's time to reassemble. Just do everything in the reverse order paying attention to not overlook anything. I also spent some time cleaning up things that are pretty much inaccessible when it's all together. If you want to repack the steering head bearings now is the time as you have all the needed essentials out of the way to do this. If you want to cheat a little and just put some new grease on the lower bearing and race without completely removing it just remove the steering stem nuts as shown three pictures below. If you want to do a more thorough job and remove it entirely you will need to remove a few more things.
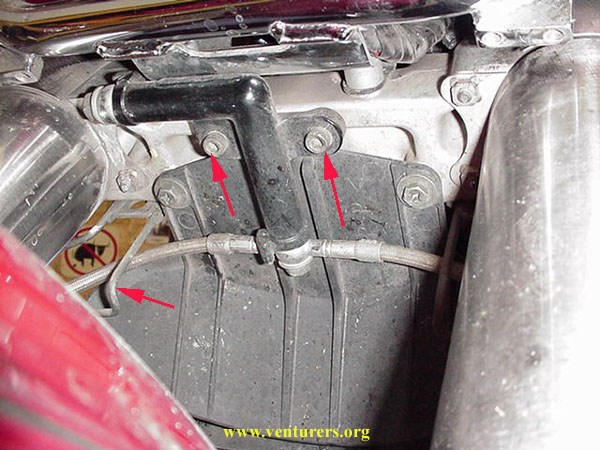
First is the fitting that the front brake lines connect to. You will want to remove the two hex screws on the fitting and also remove the bracket that the brake line runs through in the left of the picture. There is one on the left side of the bike also.
 You can leave the lower stainless covers on the stem or remove them. If you want to remove them it is the three hex screws shown here. When reinstalling these you may want to leave them loose until the forks have been installed to be sure they are lined correctly. 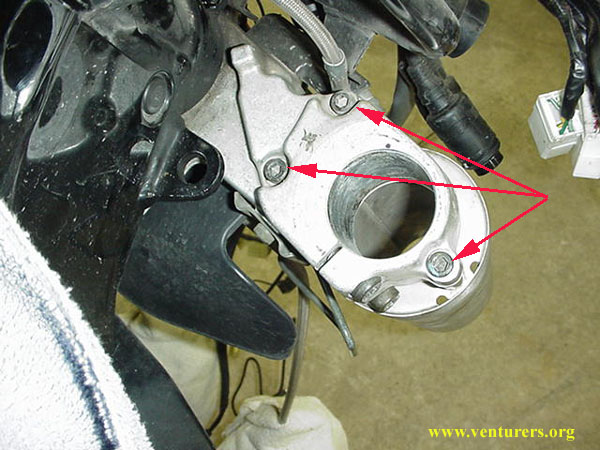 To remove the steering stem lift off the retainer that goes over the two nuts and remove the top nut, rubber washer and then the lower nut while holding on to the steering stem from the bottom (it will want to drop out). 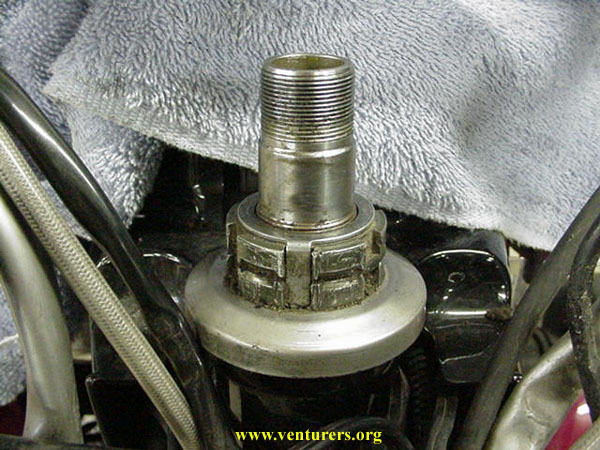 The top bearing will remain in the frame underneath the dust cap and the lower one is pressed onto the steering stem. Repack both bearings with grease (Yamaha recommends a lithium soap base grease) and apply some grease to the races in the steering head. 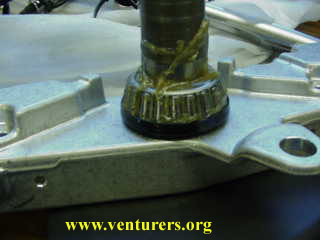 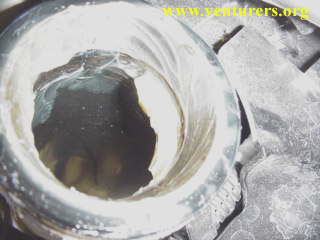 Reinstall the steering stem, then the dust cap followed by the lower nut. You will need the tool to torque this properly. The tool # is YU-33975. I think it can be ordered under part # 90890-01403-00. Torque to 37 ft bs initially, loosen and then torque to 2.2 ft lbs. Install the rubber washer and then finger tighten the top nut so the slots are aligned on both nuts to install the retainer washer. Once this has been done it's time to reassemble everything by doing it in the reverse order.
Last update: 08:45 PM Thursday, November 16, 2006 |
| Related Articles: |
| All material on webpages under the domain venturers.org, is the property of The Venturers, Inc. These materials are protected by copyright and other intellectual property laws. You may not reproduce or retransmit the materials, in whole or in part, in any manner, without the prior written consent of The Venturers, Inc. The free information contained herein is offered in the spirit of helping others and any action or advice taken from these pages is the sole responsibility of the receiver. |