 |
|
|
|
|
|
Not a member? Join Today to see why so many say they are Proud to be a Venturer!
|
|
| Synching the Carbs |
|
Author: Peter Behm Views: 20836 Votes: 32 |
|
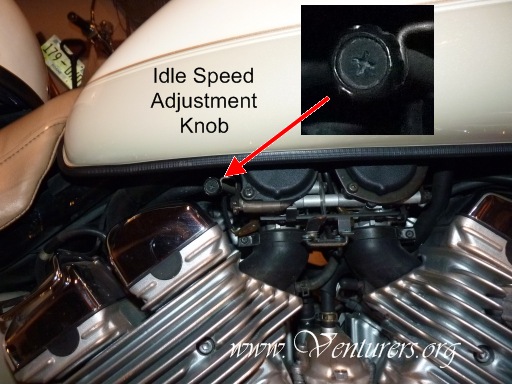
First thing you'll want to do is get the bike warmed up and make sure your idle speed is set correctly at 1000 RPM's. There are two ways you can go about synching the carbs. One is to just synch the carbs while idling or the way that I do it is to synch them while at a higher RPM. I do this as I feel I get a little smoother running at normal driving RPM's.
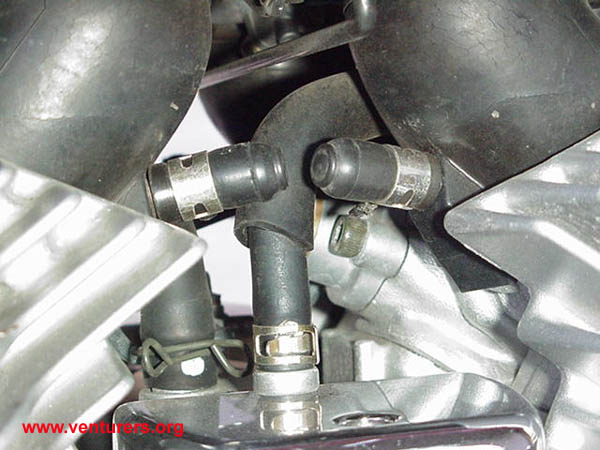
 The next step is to get access to the four brass ports on the intake runners. These are located in the middle of the "V" of the engine. If your bike is stock you will have two caps and two hoses to remove. This will be one of each for each side of the engine. In my case I have the AIS system removed and have four caps as shown. The first picture is the right side (sitting on bike) and then the left side.
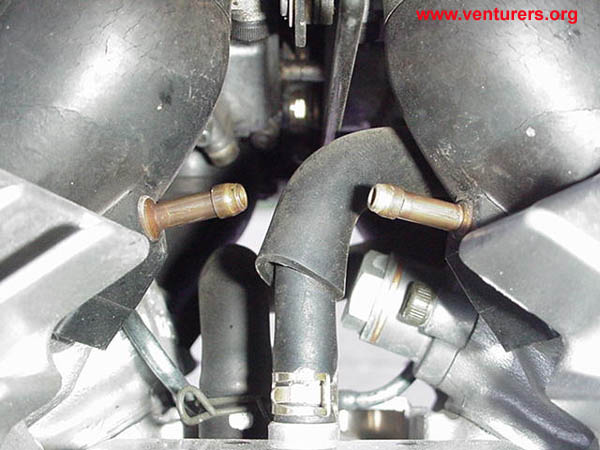
 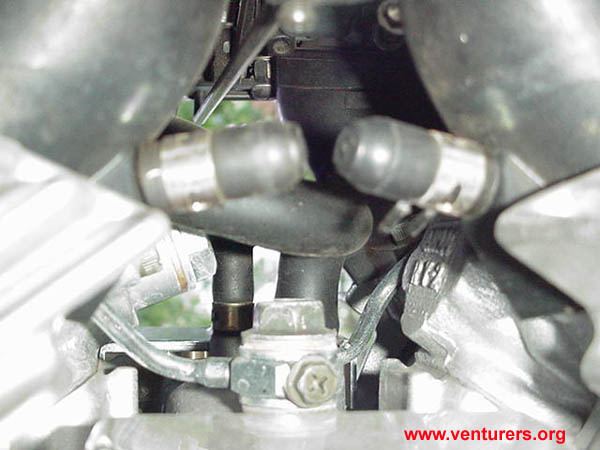 This is what you have on each side to hook up your synch gauge.
 My tool of choice for synching is a Motion Pro shown here.
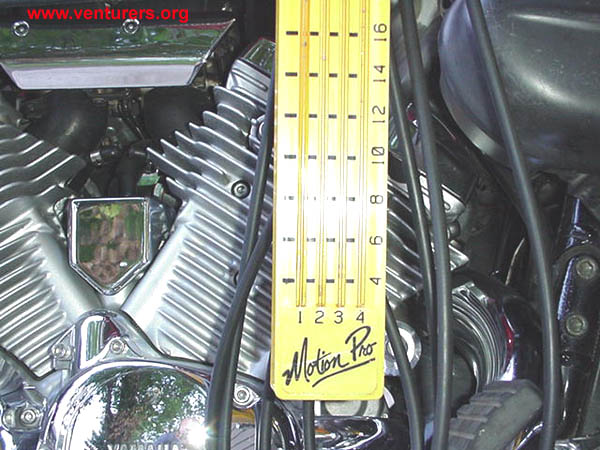 I hang the synch gauge from the right handlebar with the bars turned all the way to the left so it is less likely to fall off.
The next step is to hook up your synch gauge to the intake ports. You'll notice on this one it is labeled 1, 2, 3, 4 on the bottom. I take the hoses from 1 & 2 and route them under the carbs to the left side of the engine and hook them to the left two ports. It really doesn't matter which hose goes on what port. Take the hoses from 3 & 4 and hook them to the right side ports. Again, don't worry about hooking up the hoses to the same cylinder number as the gauge. All you're after is having 1 and 2 on the same side and 3 and 4 on the same side. One other thing is don't worry about synching the carbs to get a specific vacuum reading. Just get them all even.
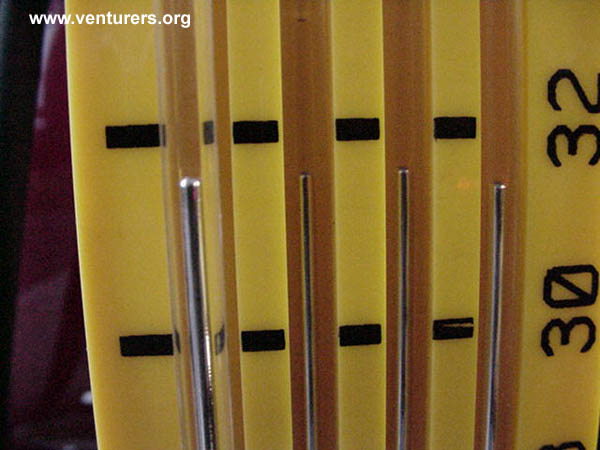
Start up the bike and see what you have for a reading on your gauge. This is what mine looked like at idle.
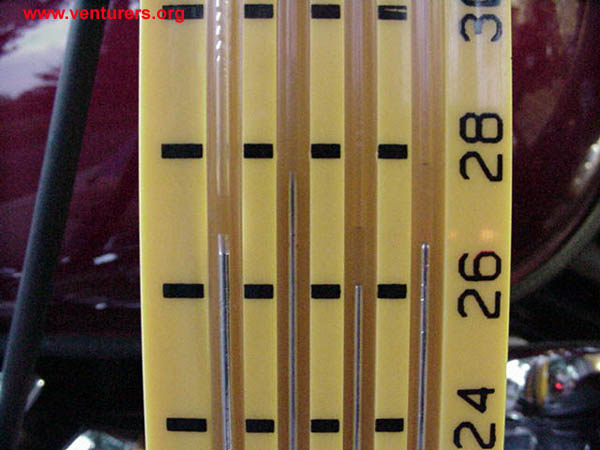 This is what I had for a cruising RPM.
 Not to bad. This is about 5000 miles worth since I last did it. With a little tweaking you can usually get a touch better. Sometimes though this is about as good as you're going to get.
Now if you need to do some adjusting here's what needs to be done. You'll want to adjust 1 to 2 on the synch tool and 3 to 4 on the synch tool. These adjustments are made with a #2 phillips screwdriver from the right side of the bike (again, direction when sitting on the bike).
Once these are done you will then synch the bank of 1 and 2 to the bank of 3 and 4. This adjustment is made with a regular screwdriver from the left side of the bike.
TAC Edit: The Yamaha Factory Service Manual incorrectly identifies the carb synch adjustment screws. Following the misprinted manual will result in great difficulty trying to get the synch adjusted correctly. This article shows the correct screws and proper sequence to make the adjustments.
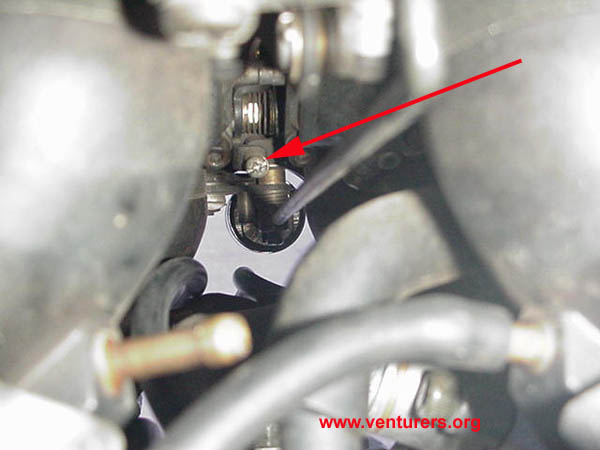
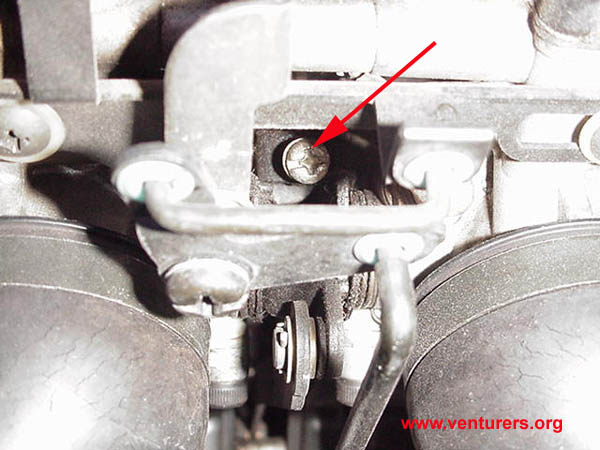
Here is the adjustment screw for doing 1 to 2 (accessed from right side). You will need a long #2 phillips to reach this one. It is located just above and left of the choke lever. I removed one of the synch gauge hoses from the intake port to get a better picture.
 Go ahead and turn the screw a little bit in one direction. If the carbs get more in synch keep turning until until it looks good. If they get farther out of synch you will have to turn the screw the opposite way. Once you think they are good, rev it up a few times and see if it still looks ok. As I said above, I do mine holding the engine at a cruising RPM and don't worry about what it's showing me at idle. Do it whichever way you prefer. Once these two carbs are set it's time for the next two.
Here is the adjustment screw for doing 3 to 4 (accessed from right side).
 Do the same thing here as the previous side. Once these two carbs are good it's time to synch the left side carbs to the right side carbs.
Here is the screw which does this and it is accessed from the left side, it is just above the choke knob. This is a hex head screw which is best turned with a standard screwdriver.
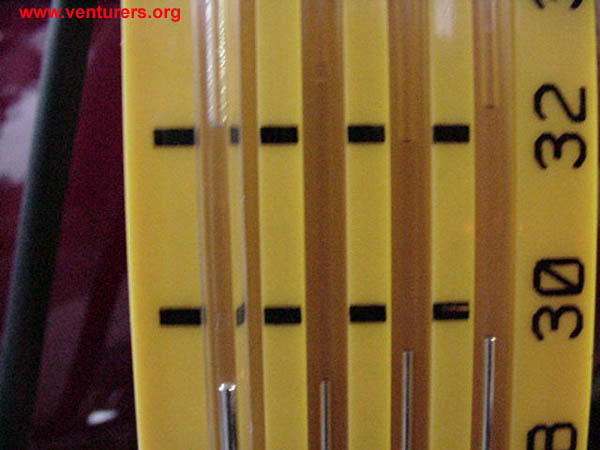
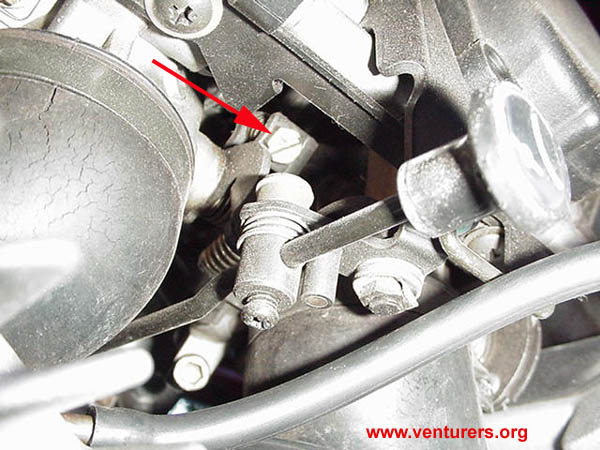 When turning this screw you will see 1 and 2 move together as well as 3 and 4 moving together. Turn the screw whichever way is needed to get them all synched together. This is what I ended up with.
 Can't complain about that.
Once everything is set shut off the engine, remove the synch gauge and then reinstall your hoses and caps.
Last update: 01:19 PM Saturday, April 23, 2011 |
| All material on webpages under the domain venturers.org, is the property of The Venturers, Inc. These materials are protected by copyright and other intellectual property laws. You may not reproduce or retransmit the materials, in whole or in part, in any manner, without the prior written consent of The Venturers, Inc. The free information contained herein is offered in the spirit of helping others and any action or advice taken from these pages is the sole responsibility of the receiver. |