 |
|
|
|
|
|
Not a member? Join Today to see why so many say they are Proud to be a Venturer!
|
|
| Changing The Coolant |
|
Author: Peter Behm Views: 58810 Votes: 56 |
|
To start off I warmed up the bike for a few minutes to get the coolant flowing and try to stir up any junk that may be in the cooling system. The next step was to remove the seat, fuel tank, lowers and also the side panels where the battery sits. (See how to links below).
Removing the Fuel Tank: http://www.venturers.org/Tech_Library/index.php?action=article&cat_id=002010&id=235
Removing the drivers seat: http://www.venturers.org/Tech_Library/index.php?action=article&cat_id=002010&id=236
Removing the lowers: http://www.venturers.org/Tech_Library/index.php?action=article&cat_id=002010&id=264
Removing the side panels: http://www.venturers.org/Tech_Library/index.php?action=article&cat_id=002010&id=270
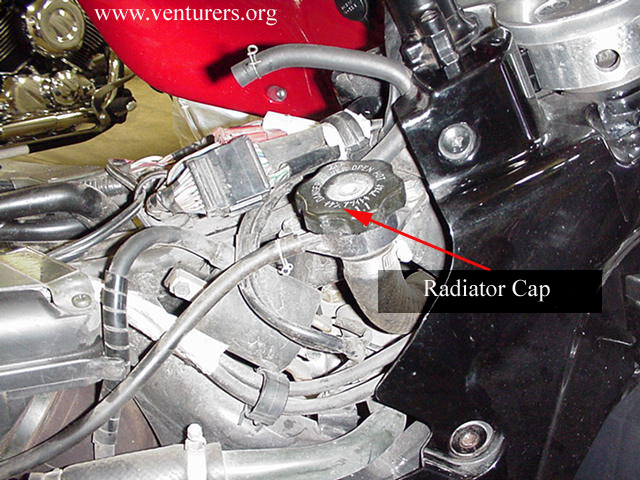
The first step in draining the coolant was to remove the radiator cap shown here. Not a bad idea to put a rag around this if the bike is still warm and then open slowly to remove any pressure. This stuff can get pretty hot quickly.
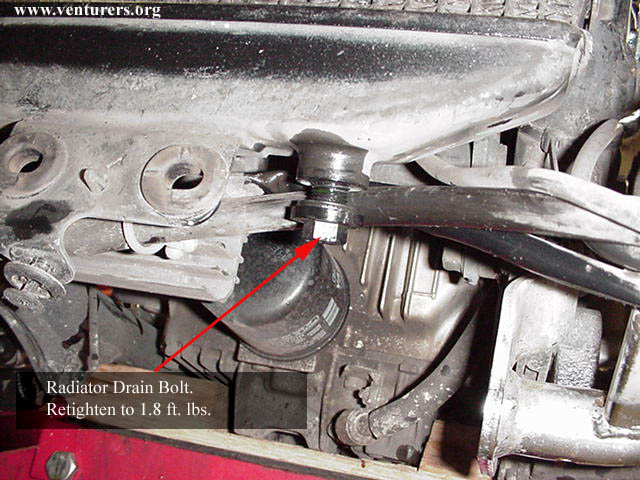
 Next drain the radiator which is done by removing the bolt shown here.
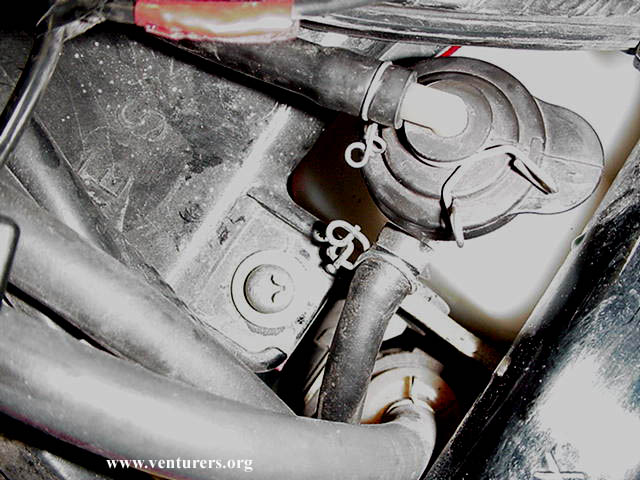
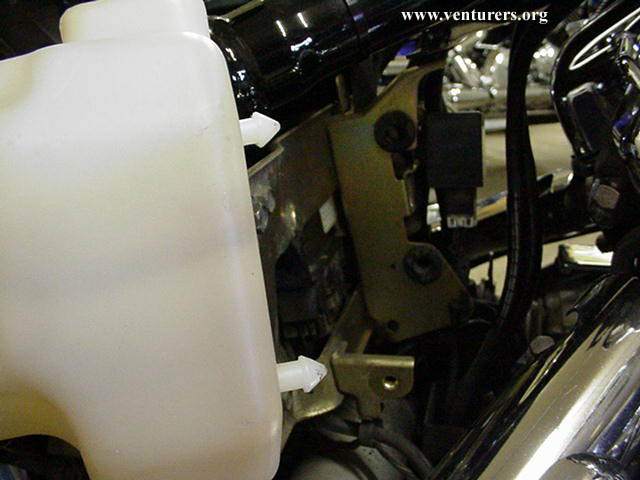
 My next step was to remove the coolant reservoir tank under the seat. I removed the cap and breather hose off the tank
 and then removed the bolt shown here that holds the reservoir to the frame.
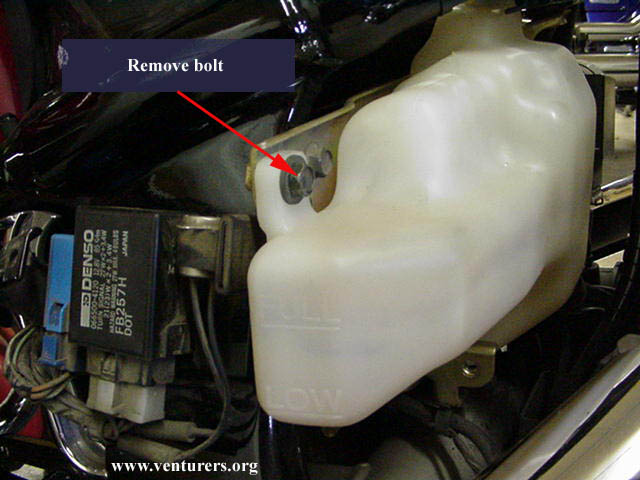 The tank is then held in place by two tabs and grommets on the back side. Gently pull towards you and it will come loose.
 You will want to dump out the coolant and then clean out the reservoir. After that is done go ahead and reinstall.
There are now two other areas that can be drained if you want to get all of the coolant that you can. The engine cylinders and the water pump. Neither hold a lot but I drained them all so I had as much out as possible.
To remove the cylinder covers remove the three hex bolts that hold each one on. You will need to remove all four covers (two on each side).
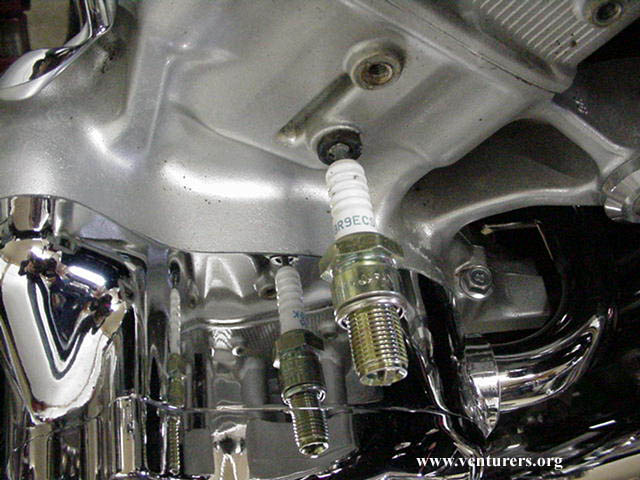
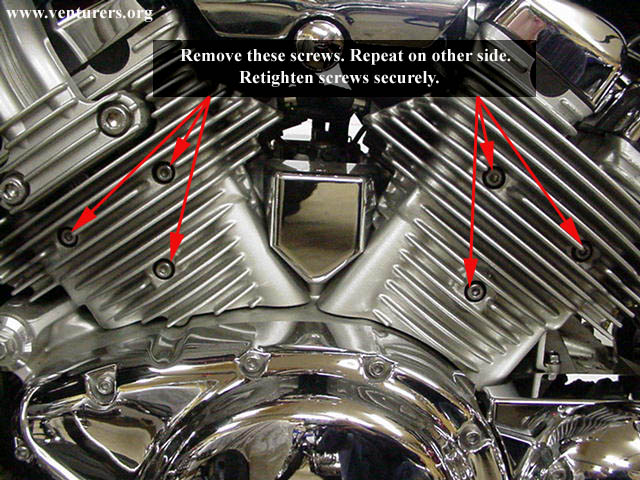 After the covers are off the cylinder drain plugs can be removed by threading a spark plug into them and gently pulling towards you.
 This is kind of a mess as there is no real way to catch the coolant as it's draining out but at least there isn't very much of it. When finished here push the drain plugs back in and reinstall the cylinder covers.
The only thing left to drain is the water pump. This is kind of tough to drain as the drain bolt is a little hard to get at. I removed the right floorboard to make it easier.
There are two hex bolts holding the floorboard on. Once these are removed I unhooked the spring that operates the rear brake light so I didn't stretch it.
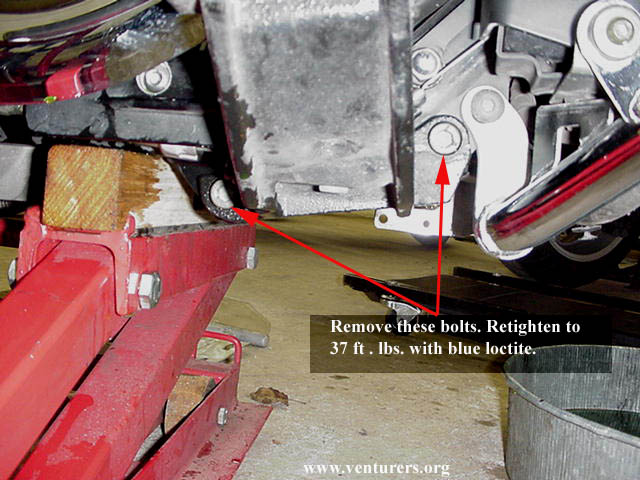 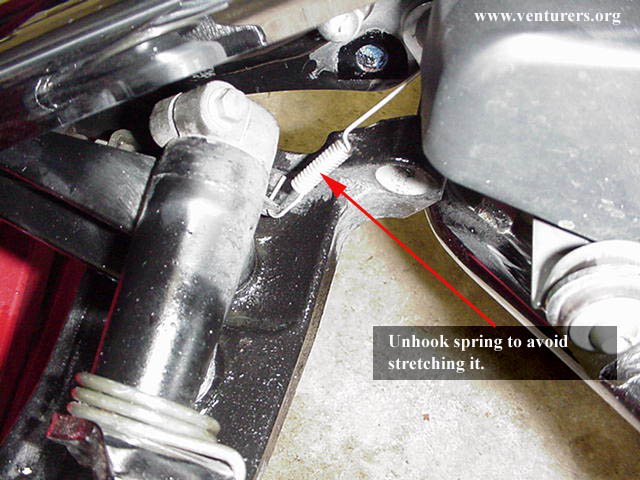 The next picture is what your after.
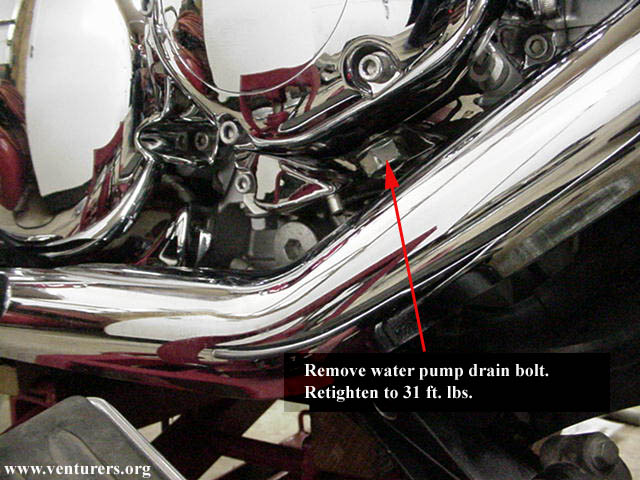 After this has been drained reinstall the spring and floorboard and it's time to refill with new coolant.
The book says the total capacity is 3.7 quarts (US) and the coolant reservoir is .89 quarts (US). I'm not sure if the reservoir amount is separate or included in the total amount but I ended up using about 3.5 quarts to fill mine back up.
I added the new coolant through the radiator cap housing until it was full. I tried to do this slowly to make it easier for any air to escape as I was filling it instead of getting big bubbles coming up and getting coolant all over. I then filled the reservoir to the proper level. I put the gas tank back on the bike (I didn't fasten it as I was going to take it off again to check the coolant level) and hooked up the fuel line. I started the bike and checked for leaks while it was warming up. Everything looked good and once the fan came on (this can be a while) I waited until it cycled off and then shut the bike off. I removed the tank and let the engine cool off for a while. I then very carefully removed the radiator cap (coolant was still pretty hot) and topped everything up again. I did this cycle one more time just to double check everything and then put everything back together.
As a side note I used a low silicate regular green coolant which was pre mixed 50/50 for this change. If you buy straight antifreeze and mix it yourself be sure to use distilled water and not tap water. This way you are assured there will not be any other minerals to affect the coolant or engine parts. It's good piece of mind for the $1.00 you'll spend on the water.
Last update: 07:06 AM Friday, March 11, 2005 |
| Related Articles: |
| All material on webpages under the domain venturers.org, is the property of The Venturers, Inc. These materials are protected by copyright and other intellectual property laws. You may not reproduce or retransmit the materials, in whole or in part, in any manner, without the prior written consent of The Venturers, Inc. The free information contained herein is offered in the spirit of helping others and any action or advice taken from these pages is the sole responsibility of the receiver. |