|
|
|
|
|
|
Not a member? Join Today to see why so many say they are Proud to be a Venturer!
|
|
| Adding a Temperature Gauge |
|
Author: Ken Chapin (wuzfuzz) Views: 12946 Votes: 9 |
|
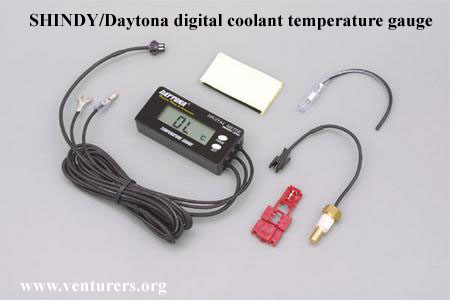
SHINDY/Daytona Coolant Temperature Gauge
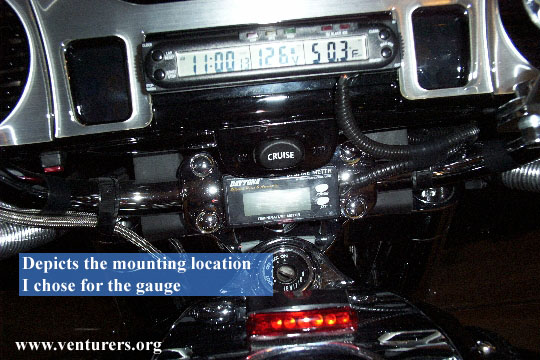
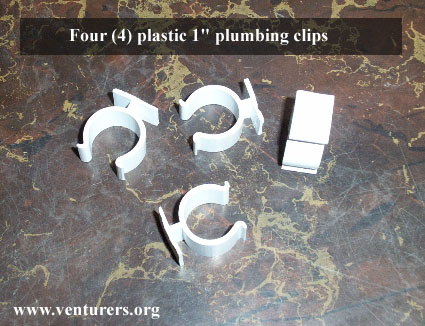
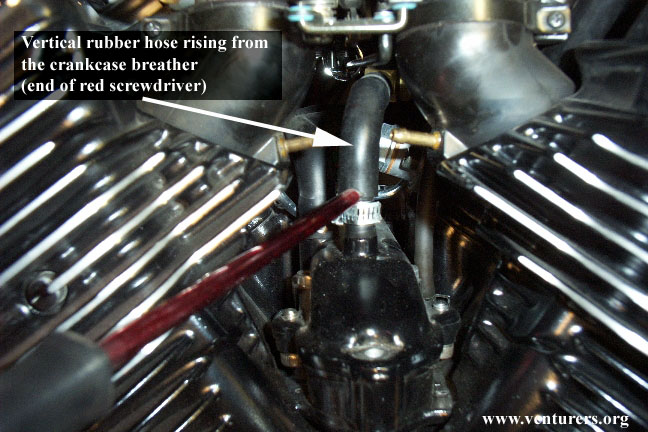
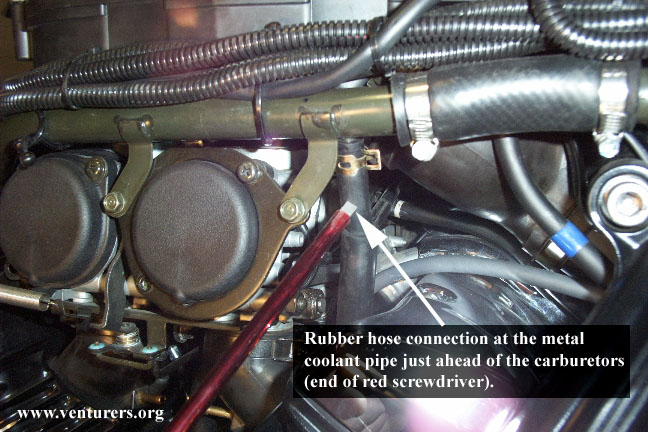
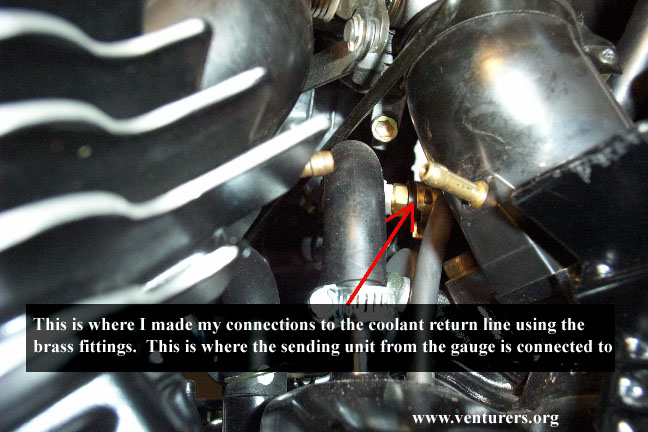
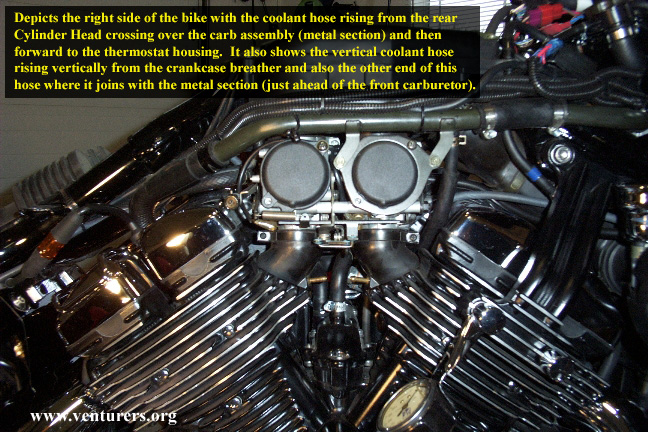
The gauge itself is available from many sources but two of them are….. www.speedwerks.com about $95 www.denniskirk.com about $100 It displays temperatures in either Celsius or Fahrenheit (at the touch of a button) and is backlit for nighttime viewing. The instructions that come with the gauge state that the sending unit “fits most Japanese motorcycles”. It will NOT fit the Royal Star Venture, however. The threads of the sending unit are standard tapered 1/8” NPT and will NOT screw into the location where the stock temperature sending unit is located (vertically mounted just to the rear of the thermostat housing). I had a reducer custom made to enable this but then decided that I wished to retain the stock idiot light and have a functioning gauge. After a little research, I found that there is a coolant return line that comes from the top of #3 Cylinder Head (right rear as you sit on the bike). This coolant return line comes vertically out of the head and goes up to and then horizontally across the top of the two carburetors for the right side of the bike. The hose from the head is rubber and is connected to metal as it crosses over the carb assembly. There is a short section of rubber hose again before it is re-connected with the thermostat housing near the filler cap for the radiator. In that horizontal section of coolant pipe that runs across the top of the carbs, you will find a smaller rubber hose that leads off and down underneath the carbs to the crankcase breather that is situated on the top of the engine block in between the front and rear cylinders. The rubber hose enters the crankcase breather vertically. The hose is, however, not connected with the crankcase breather at all….. it is a coolant return line. I went to the local hardware store and purchased a brass “T” fitting with 1/8” NPT internal threads on 3 ports. I also purchased 2 brass fittings with 1/8” NPT male threads, which would allow connection of the coolant line to the “T” fitting. After draining the engine coolant, I disconnected this coolant return line, cut the hose, removed a small 1 inch section and inserted the “T” fitting in-line. The sending unit for the gauge was connected to one port with the two ends of the hose connected to the two brass male fittings. All components were re-connected and then the coolant system was refilled. While at the hardware store, I also acquired 4 plastic clamps that are used to secure plumbing lines to various things. These clamps are 1” and clip onto the RSV’s handlebar in between the upper handlebar clamps just perfectly. Four of the clamps placed beside each other provided a flat surface for the gauge to be mounted to. A section of velcro secured the gauge to the clips. The appropriate electrical connections were made and the installation was complete. Following are some photos to help explain the procedure:
Last update: 04:27 PM Saturday, February 12, 2005 |
| Related Articles: |
| All material on webpages under the domain venturers.org, is the property of The Venturers, Inc. These materials are protected by copyright and other intellectual property laws. You may not reproduce or retransmit the materials, in whole or in part, in any manner, without the prior written consent of The Venturers, Inc. The free information contained herein is offered in the spirit of helping others and any action or advice taken from these pages is the sole responsibility of the receiver. |