|
|
|
|
|
|
Not a member? Join Today to see why so many say they are Proud to be a Venturer!
|
|
| Fuse Box Locations and ID |
|
Author: TN_Tim Views: 57518 Votes: 18 |
|
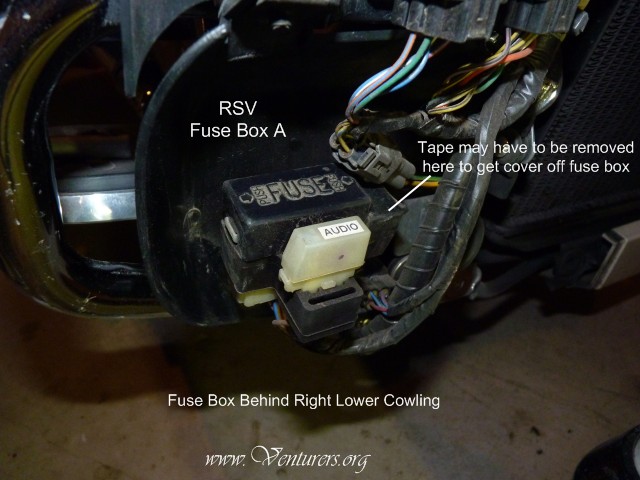
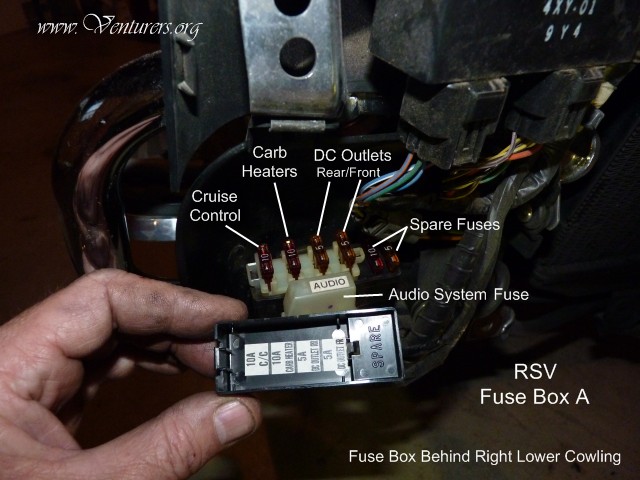
The Royal Star Venture has fuse boxes in three locations. Fuse Box "A" is located behind the right front lower cowling. To remove the cowling, remove the plastic retainer pin from the bottom of the cowling where the left and right cowlings join together. Then use a hex wrench or socket to remove the two bolts from the front of the cowling and one bolt on the backside just above the chrome crash bar. The cowling should then pull right off.
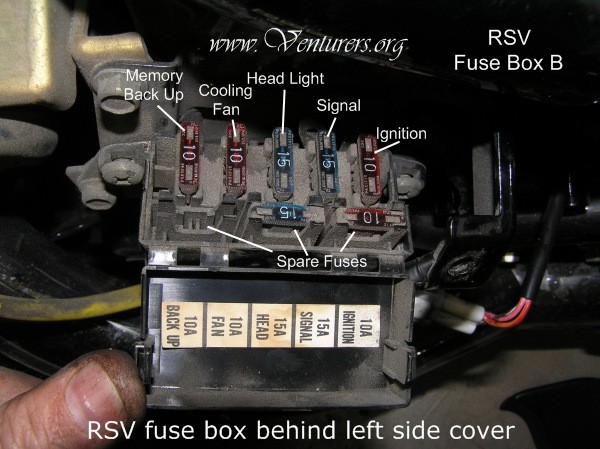
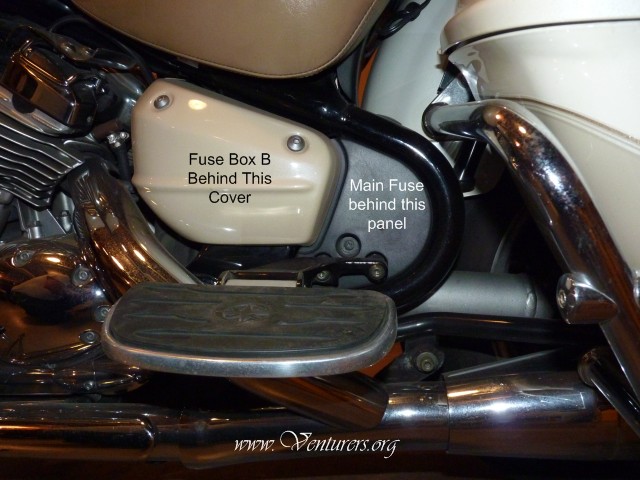
Fuse Box "B" is located behind the left side cover. To remove the side cover just remove the rear bolt in cover and pull the cover off. The front bolt does not retain the cover, it is apparently only there for decoration. The front of the cover has a peg that fits into a rubber grommet.
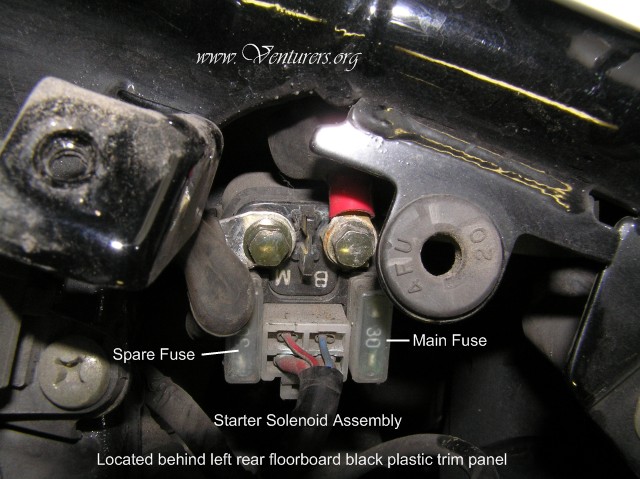
The Main Fuse is located on the starter solenoid assembly.
To access the Main Fuse, you must remove the left rear floorboard and the black plastic panel behind it.
Fuse Box A Fuse Box B Main Fuse* *Due to the location of the main fuse/solenoid assembly, it is somewhat exposed to road splash from the rear tire. There have been reports of severe corrosion of the main fuse contacts causing complete loss of electrical power on some bikes. In many of the cases, replacement of the solenoid/fuse assembly was required. If you do a lot of riding in the rain, it would be a good idea to inspect the main fuse connections occassionally to avoid having problems on the road. **If the bike has any aftermarket or Yamaha electrical accessories added, there may be additional fuses for those devices added by the installer. The location of additional fuses is at the discretion of the installer and could be anywhere in the circuit, however, the best location would be as close to the battery as possible.
Last update: 04:21 AM Saturday, January 7, 2012 |
| All material on webpages under the domain venturers.org, is the property of The Venturers, Inc. These materials are protected by copyright and other intellectual property laws. You may not reproduce or retransmit the materials, in whole or in part, in any manner, without the prior written consent of The Venturers, Inc. The free information contained herein is offered in the spirit of helping others and any action or advice taken from these pages is the sole responsibility of the receiver. |