|
|
|
|
|
|
Not a member? Join Today to see why so many say they are Proud to be a Venturer!
|
|
| Signal Dynamics Light Bar Install |
|
Author: Jack (Madjack) Moore Views: 15396 Votes: 29 |
|
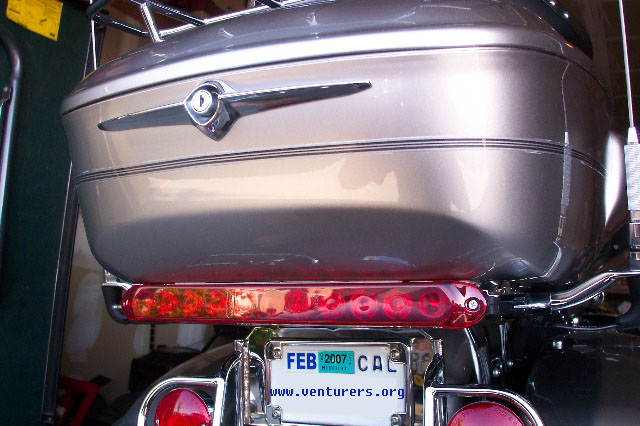
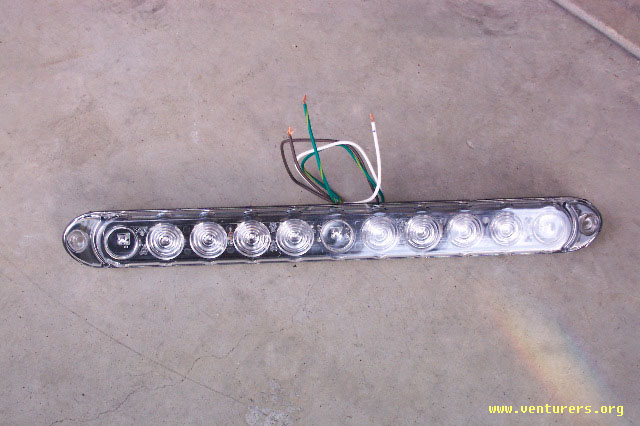
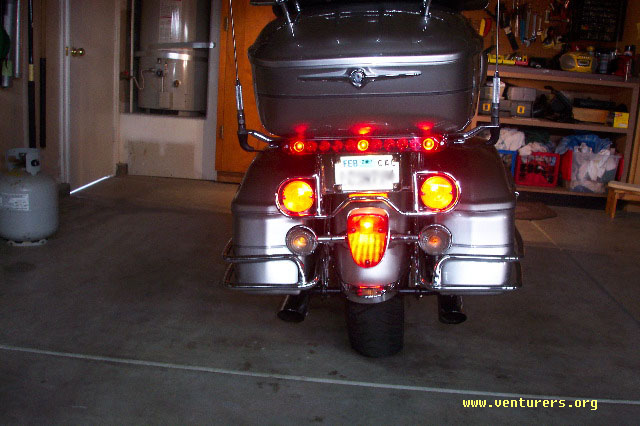
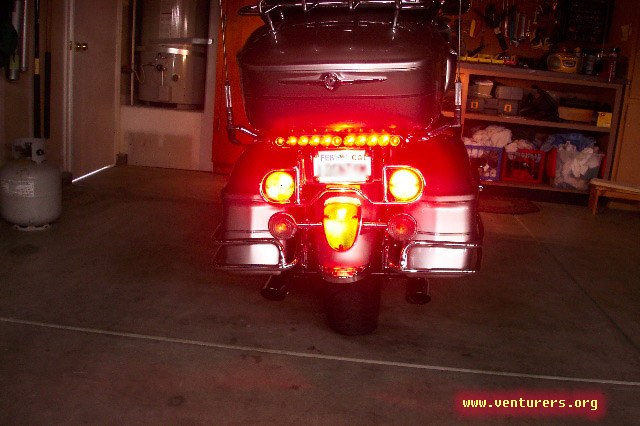
We all know that the stock 99-05 Royal Star Ventures are lacking "adequate" rear brake and running lighting. I am offering a simple and extremely easy and inexpensive solution. I call this submission "Lighting for Dummies." The product is a 15" light bar that comes in red or clear with red lights Signal Dynamics Corporation sells it. Their web sight is www.signaldynamics.com and they sell for less than $25.00 each. See photos below:
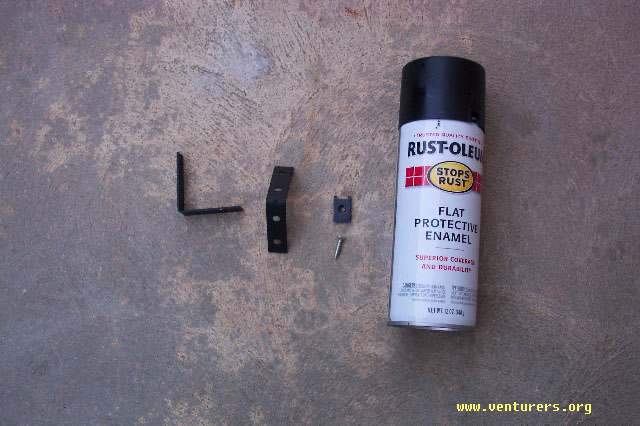
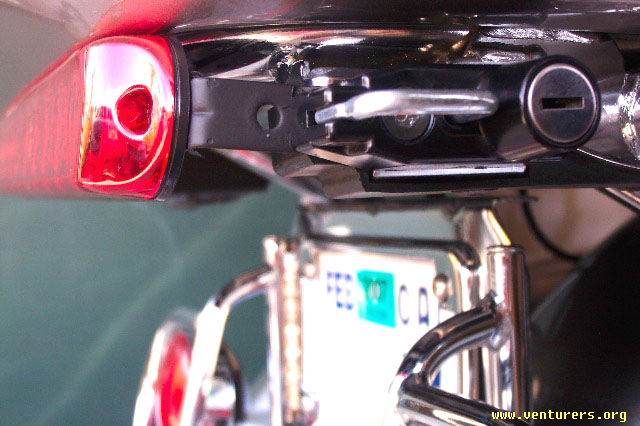
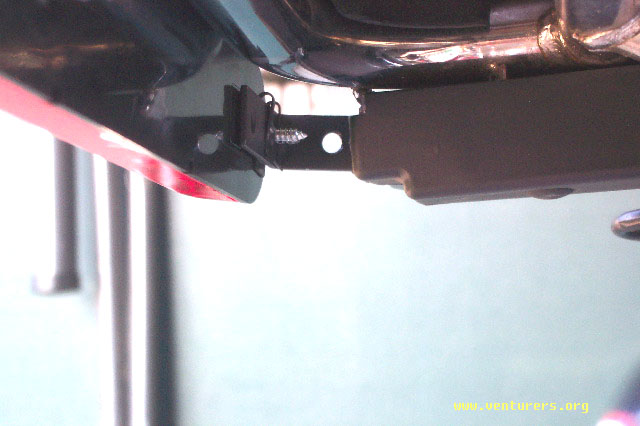
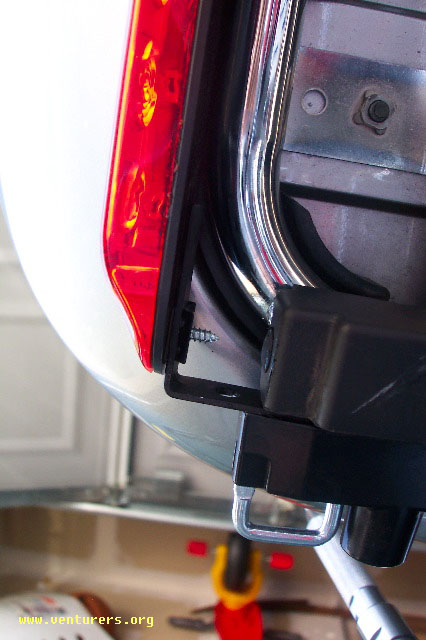
To install, you will need two 2" X 1/2" L brackets, two speed nuts, two sheet metal screws, and one can of black rustoleum paint. All of these items were found at LoweÂąs and Napa Auto Parts and cost less than $10.00. I started by painting both "L" brackets with semi-gloss black rustoleum paint. I put 4 or 5 quick coats and let them dry thoroughly. Next, I removed both helmet locks by unscrewing the star headed bolt holding them on. I purchased brackets where the holes were parallel and not offset and drilled the bracket hole out to allow the helmet holder bolt to go through and mounted the brackets behind the helmet holders and loosely put them back on. With the proper brackets, the light bar holes will match your brackets (14" on center).
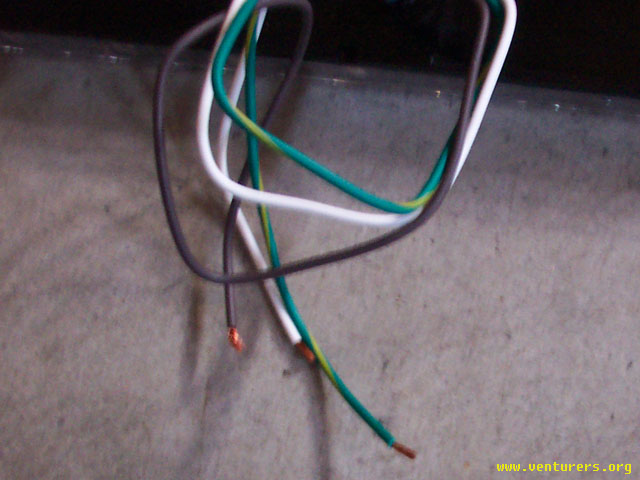
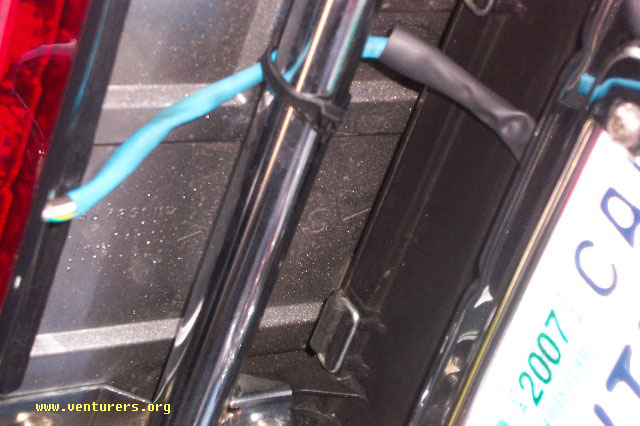
You have two options for wiring. One is to tie into the existing taillight or go under your seat and attach to the harness running from your taillight and turn signals. Either way will work. I suggest you shrink-wrap your wires before splicing.
Last update: 12:48 AM Saturday, April 22, 2006 |
| All material on webpages under the domain venturers.org, is the property of The Venturers, Inc. These materials are protected by copyright and other intellectual property laws. You may not reproduce or retransmit the materials, in whole or in part, in any manner, without the prior written consent of The Venturers, Inc. The free information contained herein is offered in the spirit of helping others and any action or advice taken from these pages is the sole responsibility of the receiver. |