|
|
|
|
|
|
Not a member? Join Today to see why so many say they are Proud to be a Venturer!
|
|
| Alternate Passing Light Installation |
|
Author: Gary L Mace (Venturous) Views: 32966 Votes: 14 |
|
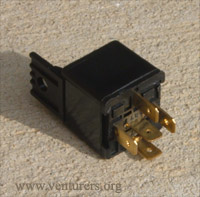
One of the most frequently asked questions is about passing light installation. Many Venturer members have installed their passing lights differently from how the Yamaha Passing Light instructions say to do it. When installed by the dealer, they are usually installed as described in the Yamaha instructions. Many members have gone back and redone the installation as described below. Why? One reason is that Yamaha instructions have you install the fuse inside of the fairing. If that fuse blows when you are on the road, do you really want to disassemble the fairing in order to change the fuse? Another reason is Yamaha instructions have the power to the passing lights being drawn straight from the headlight power lead. Some members fear that extra load could possibly cause premature ignition switch failure. Whats Different? The difference with this method is that the power to the passing lights comes straight from the battery through a 30 amp relay. An inline fuse is placed near the battery for easier access. Most folks place the fuse under the seat. To do this method, you will install the passing lights just as the Yamaha instructions describe. The difference is in how you wire the lights. This method will require that you remove the gas tank and remove the drivers seat. You will still also need to remove the fairing as instructed in the Yamaha instructions. What is a relay? An electro-magnetically operated switch used to make and break the flow of current in a circuit. As low amperage current is passed through one circuit of the relay, it switches and permits a greater current through another line. For example, when installing auxiliary lights with a heavy draw, the stock light switch may not be able to take the current. Thus a relay is installed so that when the light switch is turned on, low current is sent to the relay. The relay closes the circuit of heavy wiring directly from the battery to the lights. You can find a 30 amp relay at most automotive parts stores in the electrical department. Here is what they look like:
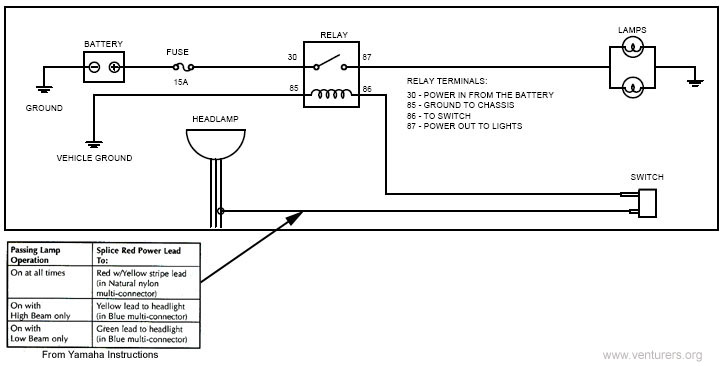
Wiring Diagram. Below shows how many of us have wired our passing lights using a relay:
Notes: 1. Some members also felt that the included switch was junk. They replaced it with a heavier duty toggle or push switch also available at your auto parts store. 2. After installing the Yamaha passing light kit, you will need to loosen or remove the light bar in order to remove the fairing front. This problem has been addressed using a special bracket made by one of our members. To learn more about this solution, see this article: http://www.venturers.org/Tech_Library/?action=article&cat_id=002002&id=248
Last update: 10:17 PM Tuesday, March 21, 2006 |
| All material on webpages under the domain venturers.org, is the property of The Venturers, Inc. These materials are protected by copyright and other intellectual property laws. You may not reproduce or retransmit the materials, in whole or in part, in any manner, without the prior written consent of The Venturers, Inc. The free information contained herein is offered in the spirit of helping others and any action or advice taken from these pages is the sole responsibility of the receiver. |