|
|
|
|
|
|
Not a member? Join Today to see why so many say they are Proud to be a Venturer!
|
|
| Rebuilding the RSV Ignition Switch |
|
Author: Peter Behm Views: 19487 Votes: 19 |
|
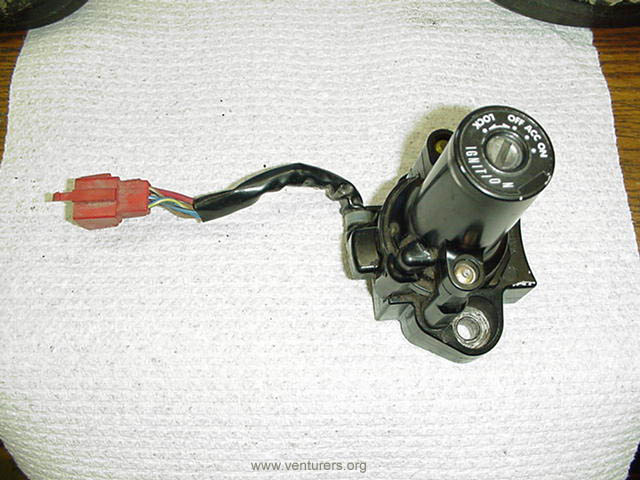
Thought I would show a few shots of how the ignition switch is put together on these bikes. I know there has been a lot of posts in the past talking about people getting stuck with two different keys after having the switch replaced. It is actually very simple to use your existing key while getting the new contacts for the switch. If you remove the two screws in the next picture this will get you into where the contacts are that need replacing when the switch fails.
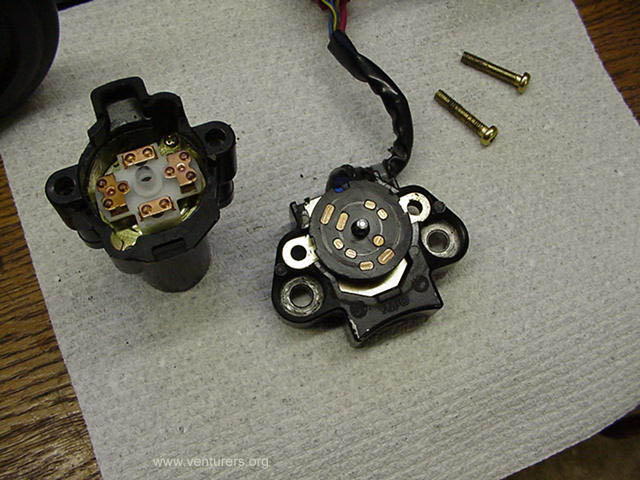
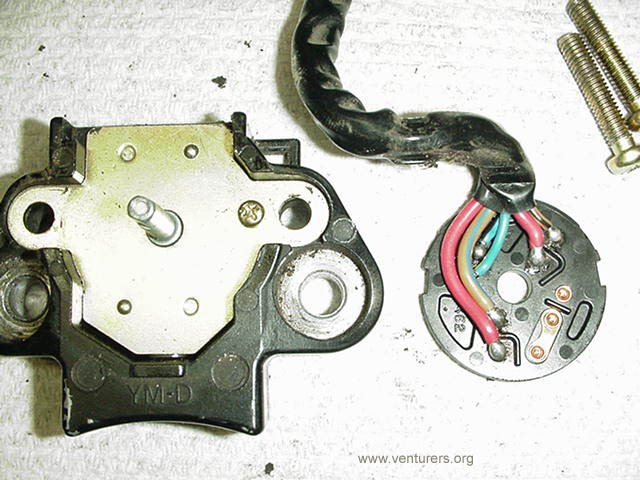
Here is what you have when the two pieces are separated.
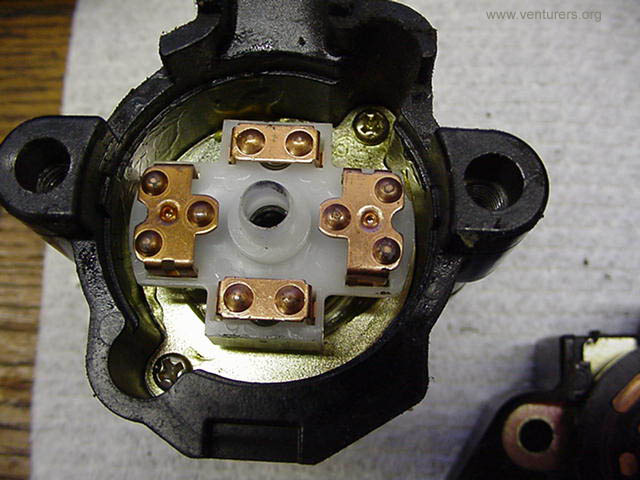
Now in order to reuse your current key in a new switch you would take your old and new switch apart as shown in the third picture and then pull this contact from your old switch.
and switch with the new part. It just slides out and has a notch on the back side that it fits in. Now just reassemble your existing cylinder onto the new base and you are all set.
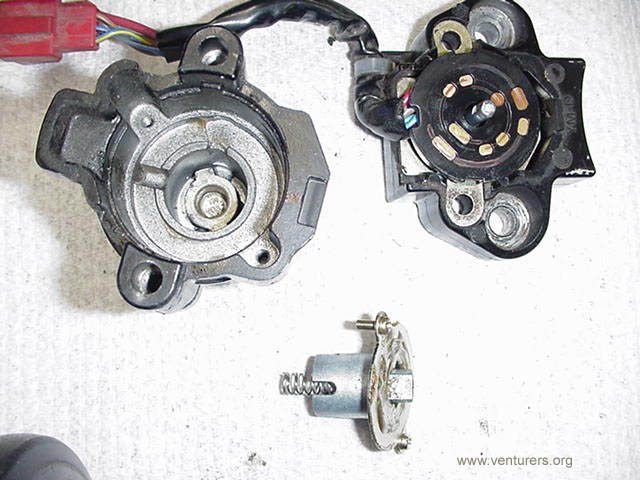
As you can see the piece in the bottom of the picture gets screwed into the assembly (pretty much sealing it off) and is taking the rotation of the cylinder and transferring it to the contacts. The key cylinder itself is still down in the bottom of the assembly and there is really no way for any lube to make it to the contacts. Here is another picture showing the bottom of the switch.
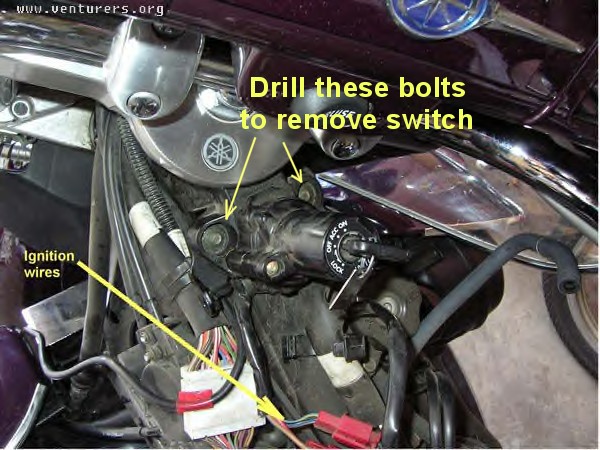
Hopefully this might help someone out in the future. 11/5/2007 TAC Update To remove the ignition switch from the bike, it is necessary to remove the tamper-resistant (rounded head) bolts, shown in picture below. Center punch the bolts, then using a sharp bit, drill the heads off the bolts. Remove the switch and then remove the remainder of the bolts with pliers. An alternate method is to use a dremel tool to slot the heads of the bolts, then use a screw driver to remove them. New bolts will be required to reinstall the new switch.
Original post 11/15/2004
Last update: 05:39 PM Monday, November 5, 2007 |
| All material on webpages under the domain venturers.org, is the property of The Venturers, Inc. These materials are protected by copyright and other intellectual property laws. You may not reproduce or retransmit the materials, in whole or in part, in any manner, without the prior written consent of The Venturers, Inc. The free information contained herein is offered in the spirit of helping others and any action or advice taken from these pages is the sole responsibility of the receiver. |