 |
|
|
|
|
|
Not a member? Join Today to see why so many say they are Proud to be a Venturer!
|
|
| Barnett SR-2 Spring Conversion and Pressure Plate Install |
|
Author: Peter Behm Views: 19725 Votes: 19 |
|
Barnett SR-2 Spring Conversion and Pressure Plate Install.
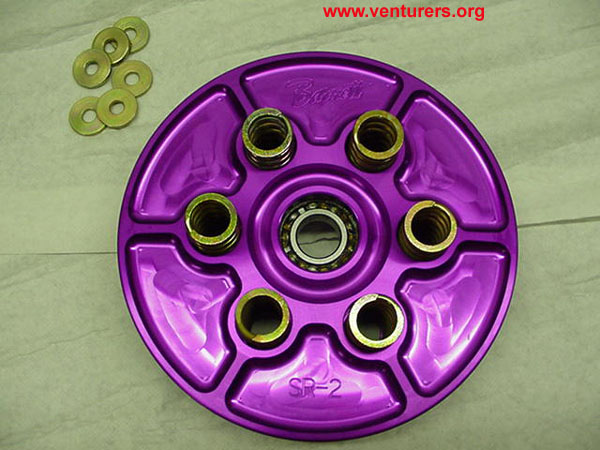
First off, here's what it looks like. Kind of a nice looking piece of hardware. I know there have been several on the forum who have installed it and have had nothing but good things to say about it.
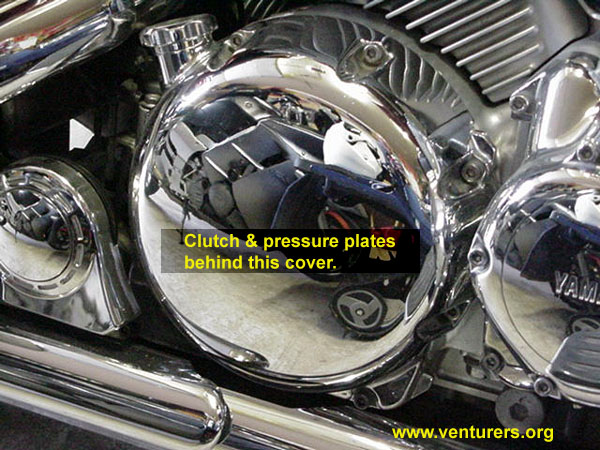
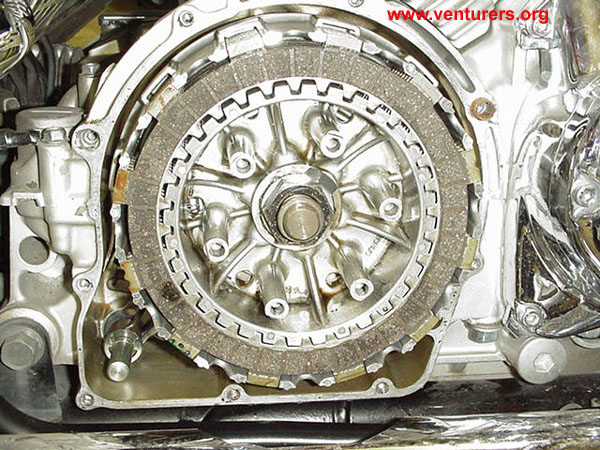
 The clutch and pressure plate are located behind this cover.
 If the bike is on the sidestand there is no need to drain the oil. If you have the bike on a stand (vertical) it will need to be drained.
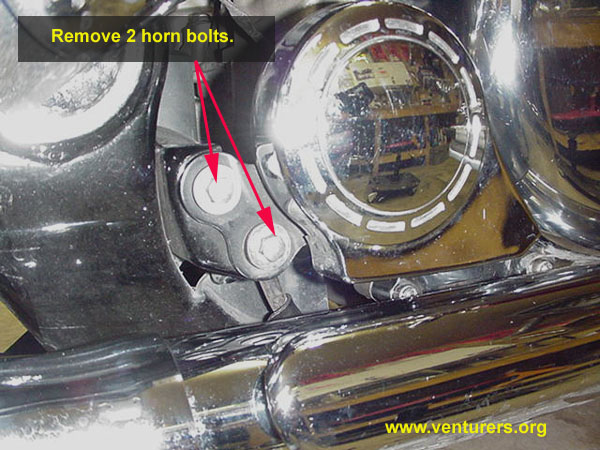
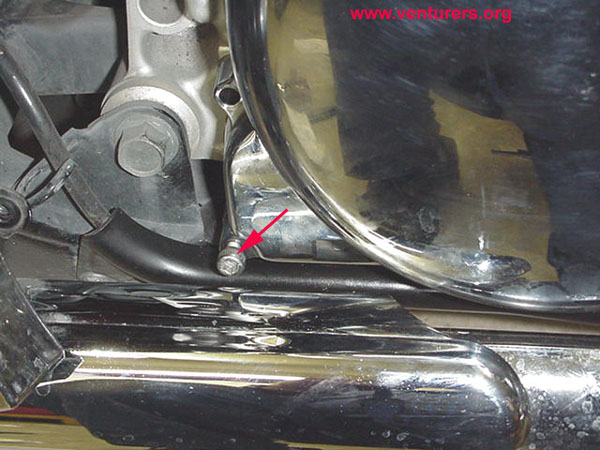
You'll need to remove the two bolts that secure the horn to the frame shown here.
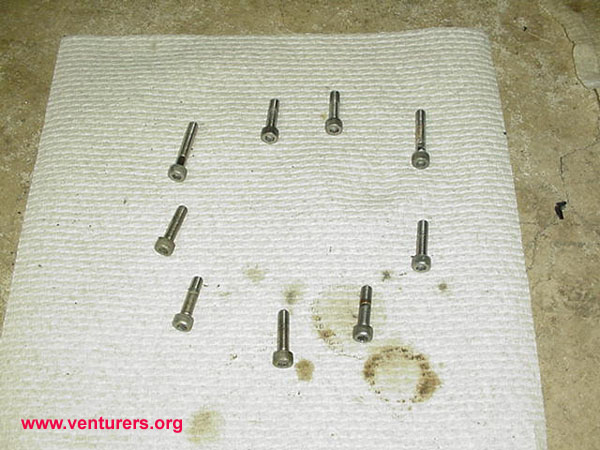
 Before removing the bolts holding the cover on I like to clean the outside of the cover off to prevent dirt from getting into the engine. I then proceed to remove the hex bolts that hold the cover on. The ones on the bottom are accessed with a ball end hex wrench. I like to lay them out the way I removed them to keep the bolts in the right position so I have the correct length bolt in the right hole.
 This bolt in the lower left can be a problem to get out with the exhaust shield there. You can loosen it and then just leave it in the cover when you take the cover off. Be sure to have it in the cover when going to reinstall.
 Once all the bolts are removed the cover can be taken off. Sometimes a slight blow with a rubber mallet is required to break it loose. I try to hit it at the oil filler cap. Remember, "tap smartly". Once the cover is loose gently pull out and lift up. Try to keep an eye on the gasket to prevent what you can from getting into the engine. This is what you'll find underneath.
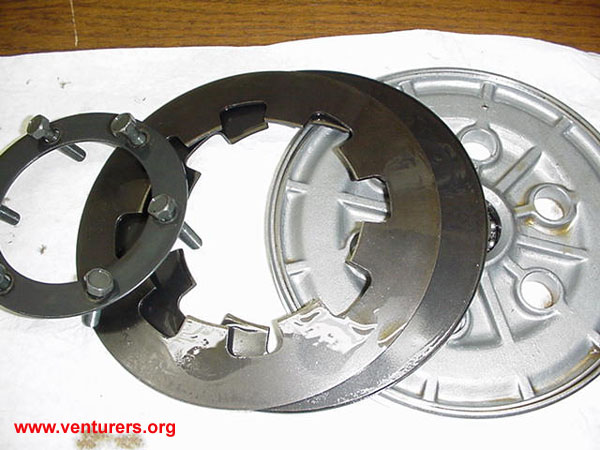
 The next picture is what needs to be removed. You'll notice that I was running two clutch springs as my clutch was slipping many miles ago and this was a cheap and easy fix. It works fine but it's not real friendly in stop and go traffic. The pull on the lever is definately stiffer. I used this set up for about 35,000 miles.
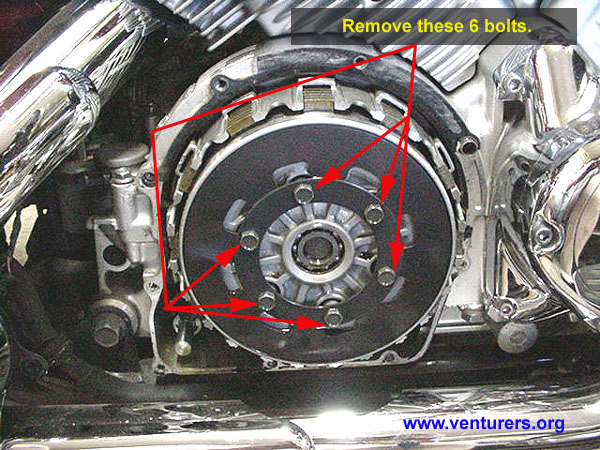
Loosen the six bolts and it all comes off.
 Once removed it should look like this. This is the time to check your friction plates as well. Mine were at the halfway point as far as thickness with 76,000 miles. I replaced all of mine at this stage. More info on this step can be seen here.
 Now is the time to remove the old gasket from the crankcase and the cover. I layed a rag over the clutch to catch any gasket material that I was scraping off. Be careful not to "ding" the gasket surface on either surface. When doing the cover be sure to place it on something soft so you do not scratch the chrome finish while it's upside down. I use a normal gasket scraper and take my time. Once everything is cleaned off it's time for the install.
Make sure the new pressure plate is clean and then set it on the clutch basket. You will reuse your old bolts with the new springs and washers. Use a shallow socket to get the bolts started, they will need some pressure to get the threads started. Once I had each bolt started a little I kept going around in a circle a little at a time until each bolt was snug. I then torqued them to 5.8 ft. lbs (or 69 INCH lbs). These bolts are easily broken if over-tightened!
TAC Edit: Note that although it is possible to install the pressure plate in 6 different positions, it will only fit correctly in two of those positions (180Âş apart). Be sure the teeth on the pressure plate align with the grooves in the clutch boss and that the pressure plate is fully seated against the clutch disc. If improperly indexed, the clutch will not operate and the lever will be very hard to pull with little or no lever travel.
 Before starting to put the cover on it's a good idea to make sure the clutch is working properly. Pull the clutch lever in and you should see the pressure plate move out away from the engine to release the clutch as shown in the video below. If everything is fine it's on to the next step.
Install the new gasket.
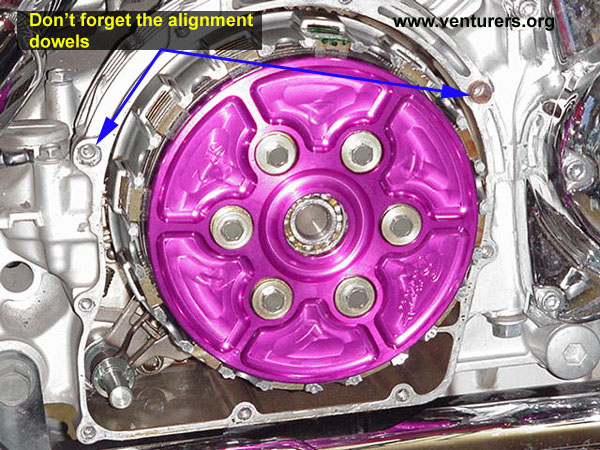
 Be sure you have both alignent dowels before proceeding. They are something that can fall off and be overlooked. If you can get them both on the cover or the crankcase it will hold the gasket in place easier. In the photo above you can see one of them in the upper right ( the rusty looking piece). The other one goes directly across from it. Mine were stuck one in the cover and one in the crankcase so I just left them alone. With the gasket in place and aligned, loosely install the cover. Be sure the gasket is on correctly at the bottom. Next get the cover bolts started. When you are sure the gasket is ok go ahead and snug the bolts up. Once snug the bolts get torqued to 7.2 ft. lbs.
Plug the harness into the backside of the horn and install the two bolts.
Start the bike and if everything is done correctly you should be drip free. You're now set to ride!
Last update: 01:58 AM Sunday, July 18, 2010 |
| Related Articles: |
| All material on webpages under the domain venturers.org, is the property of The Venturers, Inc. These materials are protected by copyright and other intellectual property laws. You may not reproduce or retransmit the materials, in whole or in part, in any manner, without the prior written consent of The Venturers, Inc. The free information contained herein is offered in the spirit of helping others and any action or advice taken from these pages is the sole responsibility of the receiver. |