|
|
|
|
|
|
Not a member? Join Today to see why so many say they are Proud to be a Venturer!
|
|
| Rear Brake Pad Replacement |
|
Author: rneal55555 Views: 12469 Votes: 10 |
|
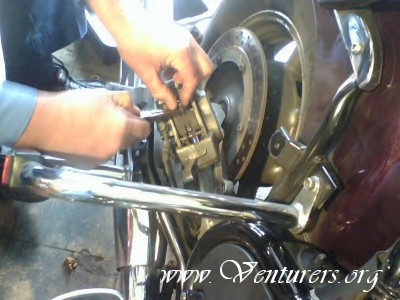
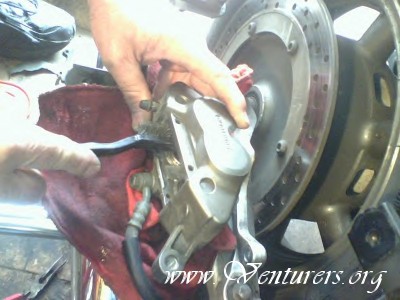
We did this early last summer at a maintenance day meet and eat at my house. Dave is a wealth of knowledge but the whole computer picture thing does him in so He graciously did the rear brakes on my RSV while I took pictures.We did this on my RSV but the principles apply to any vehicle really. Brakes the DaveB way. Remove the right-side side-bag (4, 4mm allen head screws normally) be careful not to lose any of the washers, rubbers or the spacer. Remove the dust cover. It'll allow you to get a good look at the pads and see if they are worn enough to replace. What many have found is that the pads do not wear evenly (one pad wears more than the other). Dave feels this is due to a lack of lubrication on the contact points and pins that the pads move on in the caliper. After seeing the care he uses when he does brakes I tend to agree. Next remove the caliper from the mount be removing the 2 14mm bolts. Then twist the fwd pad retaining pin so that you can pull it's little retaining spring pin and remove the retaining pin, be careful of that little spring pin at about $5 at the YamaRobber.
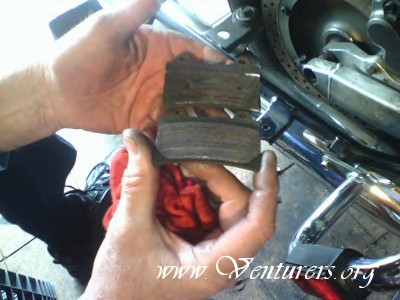
Remove the anti rattle clip and then remove the rear pad retainer pin in the same manner. Remove the pads and inspect mine looked like this one is below spec (.5mm) and the other is above. But they certainly needed replacement probably for a while.
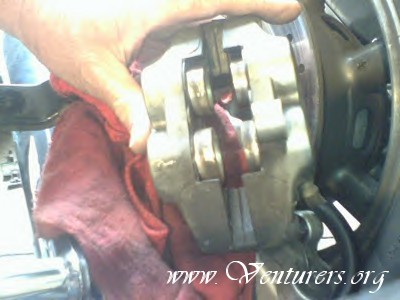
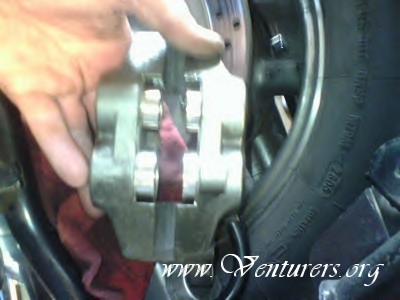
After the pads are removed clean and inspect and lubricate the caliper these are the steps that make the difference many people and shops will just blow/wipe off the callipers push in the pistons and reinstall with new pads. The extra 20 minutes or so spent hear will pay off down the road. Calipers before cleaning Spray the caliper with Brake Cleaner and blow off. The Pistons on the left after cleaning those on the right haven't got the treatment yet. SEE the difference. All four pistons clean and shiny Next put a hose on the bleeder screw with the other end in a suitable container open the bleeder and push the pistons one at a time back into the caliper using a C-Clamp sometimes just your fingers will do. If you don't open the bleeder when you push in one it will push out the others. This also serves to get rid of some old fluid. After the pistons are all fully seated in the caliper wire brush the contact points (places where the pads will come in contact with the calipers) front and rear
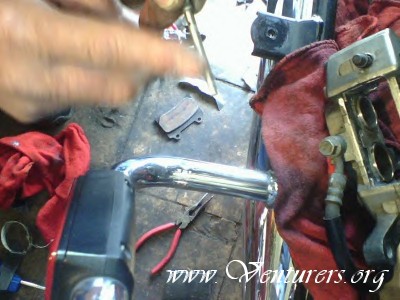
After brushing clean the caliper again with brake cleaner and air. Clean Caliper Next clean the pad retaining pins and anti rattle plate with brake cleaner, sand or emery paper until shiny. After cleaning feel all of the contact points for any rough edges that could cause the brake pads to bind/hang up. If any rough spots exist file or sand them off. If the pins are really bad consider replacing them they can be had for $5 or so. Now it it time to lubricate the contact points in the caliper, pad retaining pins, and the side of the anti rattle plate that touches the pads. REMEMBER a little anti seize goes a long way you want to just barely coat the contact points and pins BE VERY CAREFUL not to get it on the Brake Rotor or pad faces. We used standard Permatex Anti-seize available at any auto-parts store I had the 1 oz tube version Dave gets the giant economy size. You could also consider using this Clean shiny pins with anti-seize
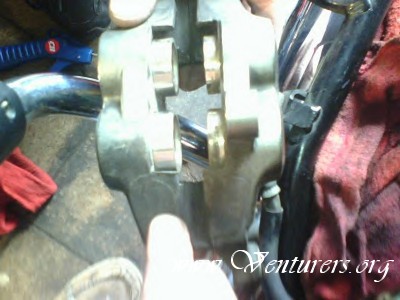
Re install the brake caliper on the mounting plate and torque the 14mm bolts to 29 FT LBS. Place the outboard pad in the caliper and push the rear pad PIN in far enough to hold it in place, put the inboard pad in the caliper and seat the rear pad retaining pin. Then install the Pad pin retaining clip. (twist the pad pin so the little hole is straight up) Install the anti rattle clip under the rear pad pin ( the anti rattle clip is marked to indicate the top and also has an arrow that points to the front of the bike) Push the clip down and install the fwd pad pin and its retaining clip. Install the dust cover (you did clean it didn't you) Slowly pump the rear brake pedal to bring the pads out into contact with the rotor. Check the Brake Fluid reservoir top it off as needed but don't over do it there needs to be an air space in the reservoir to allow the pads to retract fully. Russ Neal
Last update: 12:34 PM Sunday, November 4, 2007 |
| Related Articles: |
| All material on webpages under the domain venturers.org, is the property of The Venturers, Inc. These materials are protected by copyright and other intellectual property laws. You may not reproduce or retransmit the materials, in whole or in part, in any manner, without the prior written consent of The Venturers, Inc. The free information contained herein is offered in the spirit of helping others and any action or advice taken from these pages is the sole responsibility of the receiver. |