|
I have always disliked how the crash bars move around on my 2003 RSV. As everyone knows they will flex forward and backward with great ease. When an RSV is dropped this often leads to a crash bar being bent backwards to some degree which also affects how the cowling around the radiator comes together at the bottom. The bent crash bar often makes the highway pegs out of position for a comfortable ride. I might add the original idea is not mine but one of another RSV rider who is not a member. I simply modified his idea to fit my bike. This is a simple idea that anyone can do!
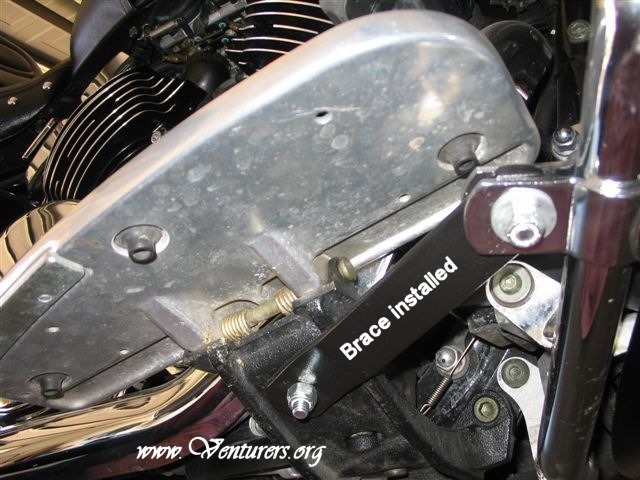
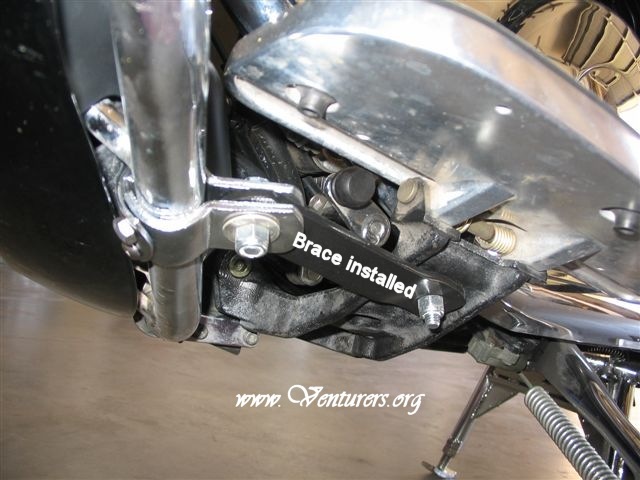
Here is a picture of the finished product on the left and right side of the bike.
Right Side
Left Side
To do this I purchased a 24 inch piece of 3/16" x 1 ÂĽ" flat metal stock from local hardware store, (you will only need about 12" of this) 4- 5/16" x 1" long hex head plated bolts, 4- 5/16" nylon lined locking nuts, and 4- 5/16 x 1" plated washers. You will also need two crash bar clamps (for 1"crash bars) just like the ones you would use to mount highway pegs with.
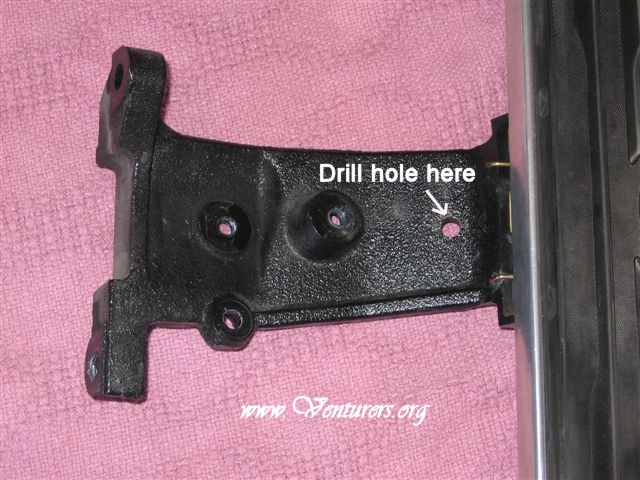
To start remove the floorboard bracket on the bike. There are approximately 5 bolts on either side that will have to come out. Next, you need to drill a 5/16" hole in the floorboard bracket. To lay your hole out, take your bracket and lay it down on a flat surface. You will notice the bracket curves upward towards the floorboard. The bolt hole needs to be drilled in such a location to allow the hex head of the 5/16" bolt to lay flat and not up on the curve of the bracket. What I did was place the bolt (head down) on top of the floorboard bracket, this will show you how far down the hole needs to be from the curve. The hole is centered between the front and rear sides of the floorboard bracket.
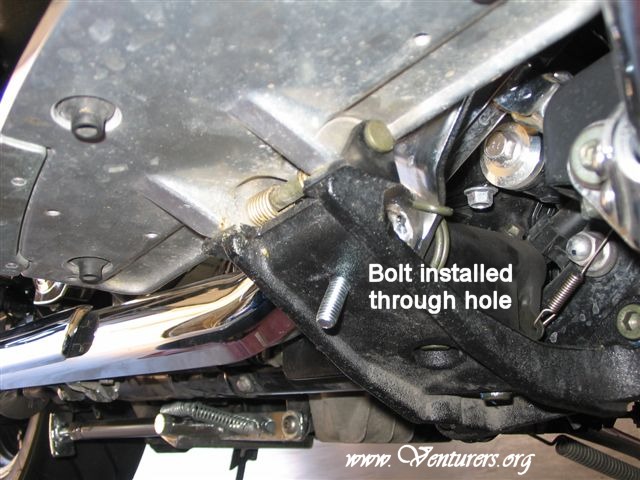
Place a 5/16 bolt in each hole and remount the floorboard brackets.
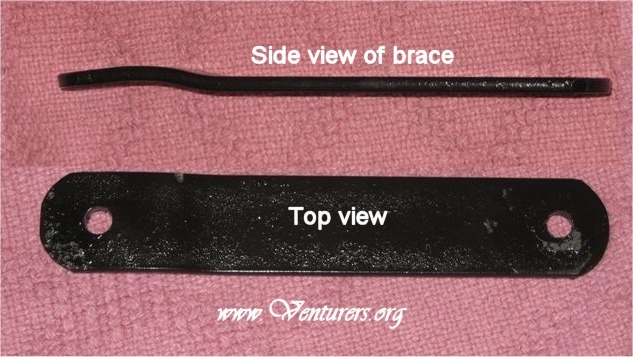
Install the clamp on the crash bar and leave it loose where it will slide up and down on the bar. Dimensions of the center to center holes on the brace is probably different on every bike depending on whether the bike has ever been dropped or the crash bars kicked or pushed on, which moves the bars backwards or forwards. Here is how you find your dimension. Simply put the clamp on the bar where you think it will give you the best support. Notice the left and right crash bars are made slightly different, so choose a spot for your clamp that will match on both sides. Now measure the distance from the center of the hole in the clamp, to the center of the 5/16' bolt that you installed in the floorboard bracket. That measurement is the center to center of the holes in the brace. Some have just used a straight piece of the 3/16" flat stock long enough to go from the clamp to the opposite side of the floorboard bracket with the correct hole centers drilled in them. I bent an offset the thickness of the stock on one end with a 5/16" hole drilled center of the width of the stock and Âľ" back from the end and round off the corners with a grinder. From that hole measure to your next hole and drill it. I again rounded the corners with a grinder. See picture below.
Now do the other side, paint them if you wish and mount them. You will be surprised at how sturdy your crash bars are now!
Last update: 11:30 AM Saturday, March 17, 2007
|
