royal star venture technical help

yamaha venture technical support


Not a member? Join Today to see why so many say they are Proud to be a Venturer!


Library Home Page > 2nd Generation (1999 to current) > Body & Chassis
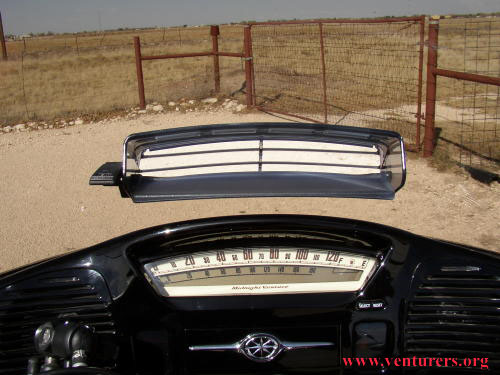
Honda Vent in an RSV Windshield
  Author: Ken Thompson (Pudge)
  Views: 14998     Votes: 6
  Print
 

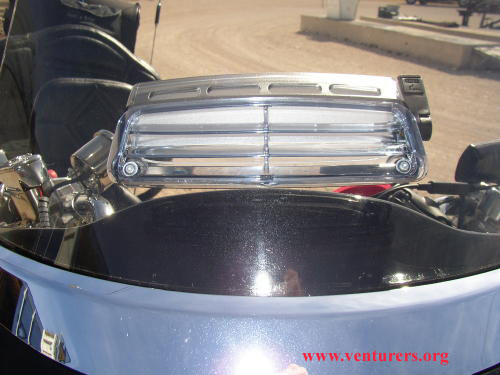
Installation of a Honda OEM Windshield Vent in an RSV Windshield


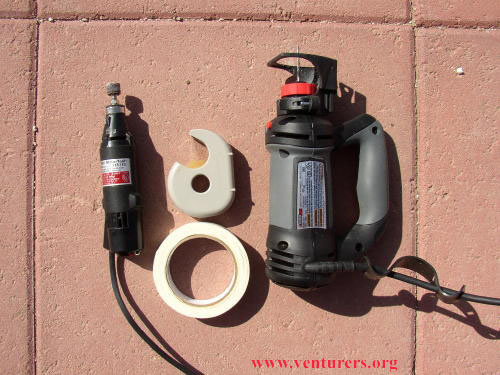
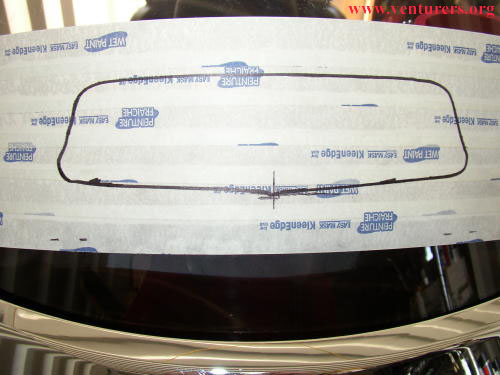
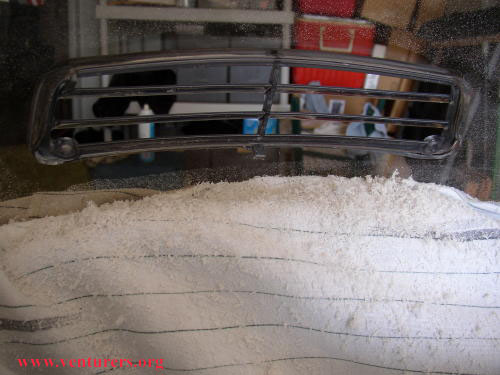
If you’d like a bit more breeze in the cockpit of your RSV, you can install a Honda OEM Windshield Vent in the windshield of your Venture. It’s a fairly straightforward procedure after you get the parts and tools in hand. The easiest and simplest way to obtain the parts is to contact RickH at www.buckeyeperformance.com/ and ask him to order you the complete kit. He’ll do so, and you’ll have all the parts necessary to do the job.


Tools required are a RotoZip (or similar) tool, a Dremel (or similar) tool, a roll of masking tape, a roll of Scotch tape, a measuring tape or ruler, and a Black Sharpie marker. I also highly recommend that you sneak one of your wife’s old sheets out of the house to cover up your motorcycle or else you’ll have those little bits of lexan or plexiglass  ALL over everything. Static electricity causes these bits to cling to everything like a booger to the end of your finger! Trust me, it’s worth the cost of using the sheet to avoid this mess!! Wrap the sheet clear around the fairing underneath the shield, paying particular attention to fitting it as far down into the space between the dash and the shield as possible. Make sure it’s firmly and securely in place, so it won’t move during this operation. Here’s a picture of the tools I used:


I was very fortunate to have a template to mark the hole for the vent in my shield. This was generously provided to me by Kelly Cole of this forum. If you would like a copy, pm me with your USPS mailing address and I’ll be happy to mail you a copy. My first step was to cover the area where I intended to make the cut with masking tape. Use the kind that doesn’t leave adhesive behind when you remove it. I measured from side to side on the shield to determine the center and then measured up from the chrome trim ring to mark the spot for the bottom of the cut. Kelly set his vent in the shield with the bottom of the cut at 2 ¾ inches above the trim ring. I set mine at 3 inches up because I wanted to make certain I could wipe off my dash underneath the vent. After my installation, the air that comes through the vent strikes me at about my chin (I’m 6 feet tall). The vent could be lowered as much as a quarter of an inch with no troubles at all. After determining center and bottom, tape your template to the shield so that the hole will be centered and level with the bike. You can measure up from the trim ring to the bottom of the template paper to do this easily. When the position of the template suits you, carefully trace the edges of the hole onto the masking tape and then remove your template.


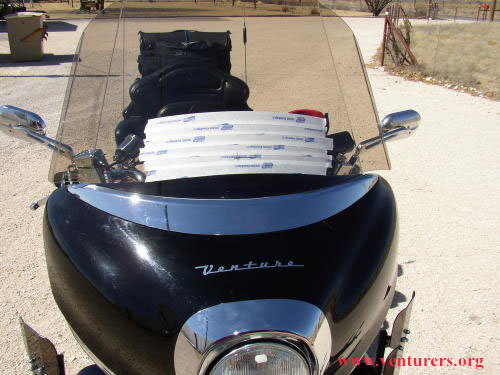
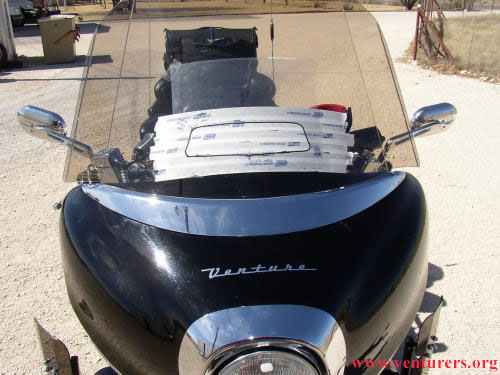
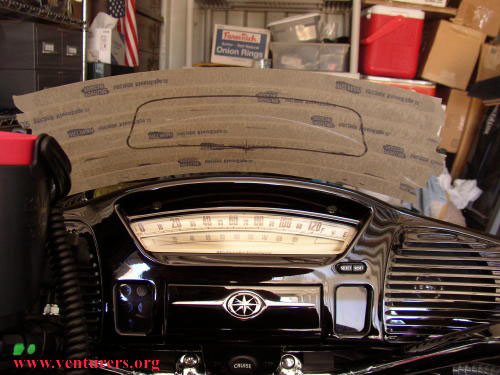
You can make your own template by taking your vent apart and using the front piece for the pattern. If you use the template I have, the mark you make will result in a hole slightly small for the vent. This will allow you to use your dremel tool with a drum sander to carefully sand out to the edge of the line to allow the front portion of the vent to fit the hole. Notice that the front piece of the vent has a tab along the top inside edge that will fit inside and behind the shield when the piece is installed and which will capture the top of the rear half of the vent. There is also a lock tab in the center bottom of the front piece that will capture the bottom of the rear half, in addition to two screws with nuts (and nylon washers) that secure the two pieces of the vent together with the shield sandwiched between them.


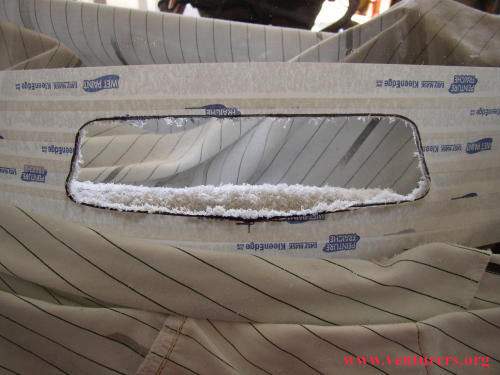
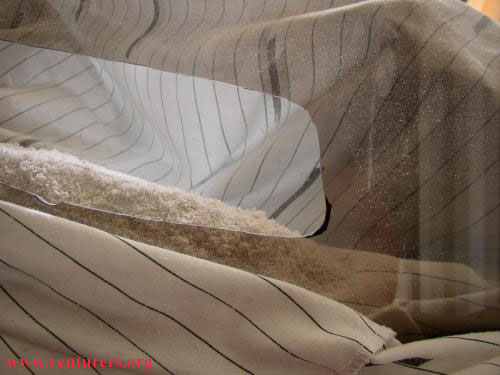
Carefully use the RotoZip tool (with a laminate bit installed and the foot extended to the maximum so as to keep the bit from protruding too far into the cockpit of your bike!) to cut out the hole. The tool should be held perpendicular to the surface of the shield. Penetrate the shield in the center area to be removed and carefully move out to the inside edge of your mark. At the edge, very carefully begin to move the tool in a counterclockwise direction, just touching the inside edge of the mark with the bit. Take your time, and stop to rest if you get shaky. Use eye protection to keep bits out of your eyes. After carefully making the full cut, remove the tool and the portion you just cut out of the shield.


Time for a break to rest a bit and look things over!! When you are ready to go again, use the dremel tool with the rotary sanding drum to smooth and further trim the edges of the hole out to the outer edge of the mark. Be careful, and go slow. You can always remove more, but it’s really hard to put back if you take off too much. There’s a bit of leeway, since the edges of the vent will probably cover a couple mm’s of error. Be sure to hold the dremel perpendicular to the surface of the shield, and be careful not to pull the drum out of the hole and let it skate across the shield!!


When you get very close to the edge of your mark, you can remove your masking tape and finish the sanding and cleaning of your edges. At some point in this process, stop and slip the front half of the vent into the hole and see where you are. Use your sharpie to mark places that need a bit more plastic removed. Take your time and sand a bit and fit a bit so that you can make your hole just large enough to allow the front half to fit inside.


When that’s done, it’s time for a rest and a deep breath to relax. While you’re resting, carefully remove the sheet (without spilling the bits and pieces created by the tools) and take it away from your bike (and downwind!) and shake it out well. I sprayed some aerosol windshield cleaner on the shield and used a towel to gently wipe up the pieces of “stuff” that were clinging to it. I also used some compressed air to get all the bits out of the crack between the dash and the inside of the shield.


At this point, I used my Plexus to thoroughly clean both sides of my shield and then installed the vent in place. Place the front half of the vent in the hole, and while holding some pressure against the upper corners, catch the top tab with the inside half all the way across and then apply pressure to the bottom center of each half to snap the locking tab into place there. Then insert a screw with a nylon washer on it into one of the two holes in each bottom corner of the vent. It’s a bit tricky to hold the screw while also holding the other nylon washer and nut on the inside to get them started. If you can find a second pair of hands to help here, they would really be useful to get the nuts and nylon washers in place and started. Once that’s done, snugly tighten each in place. Then operate your vent control on the inside to make certain the vent will open and close properly. At this point, you should be ready to put up your tools and take your Venture for a ride to see how your new vent works. Following are some pictures of the vent in place. One is from the front, and two are from the inside of the shield, showing the vent both open and closed.


This is not a difficult job. After all, I did it, and that means you can do it too! You could probably do this with just a dremel tool and the proper kind of rotary bit, but without the shoe that allows the tool to rest on the surface of the shield and keep it perpendicular, the job would be a lot harder and it would be easier to make a cut you don’t want. The RotoZip (or similar tool) makes it pretty easy to make the cut. Just take your time, and be very careful. Measure twice and cut once!  Good luck!!


Last update: 12:47 AM Monday, March 13, 2006

Related Articles:


Not a member? Join Today to see why so many say they are Proud to be a Venturer!

Copyright 2000-2018 The Venturers, Inc.
All Rights Reserved
All material on webpages under the domain venturers.org, is the property of The Venturers, Inc. These materials are protected by copyright and other intellectual property laws. You may not reproduce or retransmit the materials, in whole or in part, in any manner, without the prior written consent of The Venturers, Inc. The free information contained herein is offered in the spirit of helping others and any action or advice taken from these pages is the sole responsibility of the receiver.