 |
|
|
|
|
|
Not a member? Join Today to see why so many say they are Proud to be a Venturer!
|
|
| Removing the Lowers |
|
Author: Peter Behm Views: 16816 Votes: 9 |
|
The only tools you will need are phillips screwdriver and a 4mm hex wrench. The right lower will need to be removed first as it overlaps the left one at the bottom under the radiator.
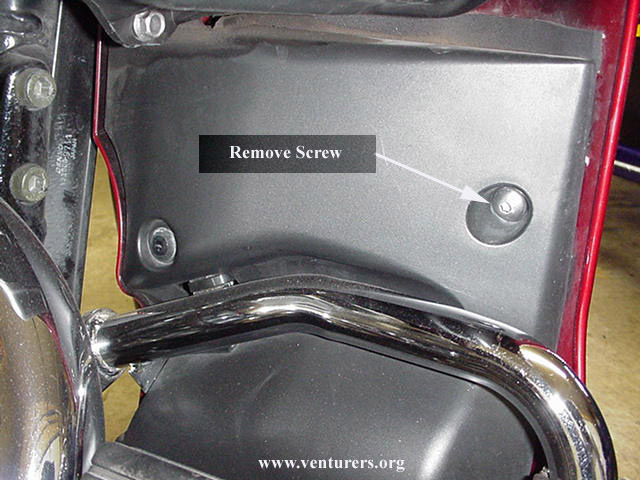
This outer screw needs to be removed on both sides.
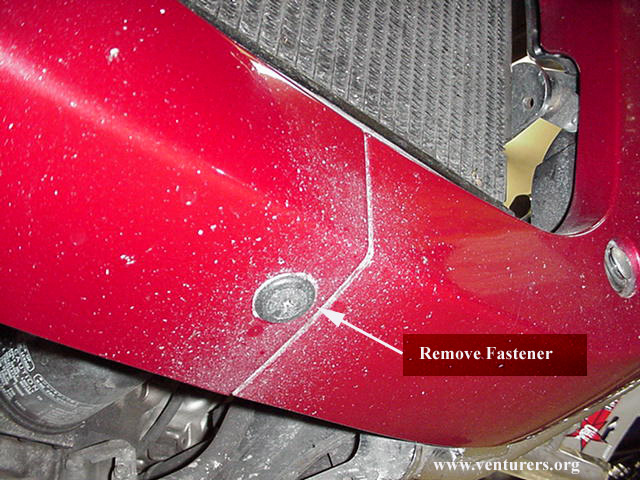
 It's easier to remove the bottom fastener now before removing the other screws. The head is a phillips and it will unscrew a little ways then the whole fastener can be pulled out.
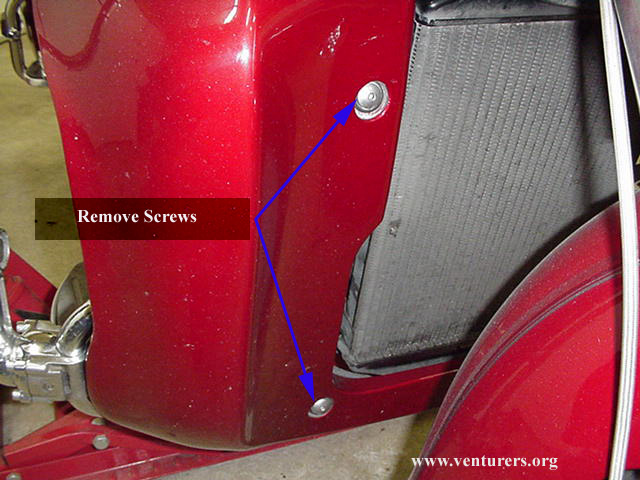
 There are now just two screws remaining that hold the lowers on.
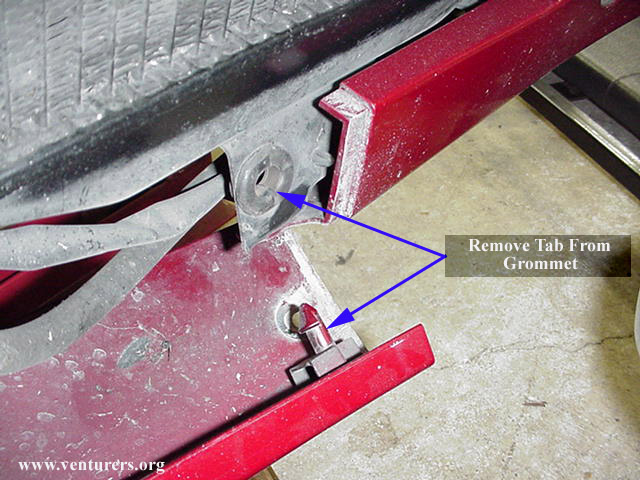
 With all the screws out the only thing remaining to do is gently pull the tab out of the grommet. The other lower has the same tab. Also notice how the right side overlaps the left.
 To install, just reverse the procedure.
Last update: 10:00 PM Monday, February 7, 2005 |
| All material on webpages under the domain venturers.org, is the property of The Venturers, Inc. These materials are protected by copyright and other intellectual property laws. You may not reproduce or retransmit the materials, in whole or in part, in any manner, without the prior written consent of The Venturers, Inc. The free information contained herein is offered in the spirit of helping others and any action or advice taken from these pages is the sole responsibility of the receiver. |