|
|
|
|
|
|
Not a member? Join Today to see why so many say they are Proud to be a Venturer!
|
|
| Water Pump Repair - 83 and 84 Venture |
|
Author: Scott MacMartin Views: 18556 Votes: 14 |
|
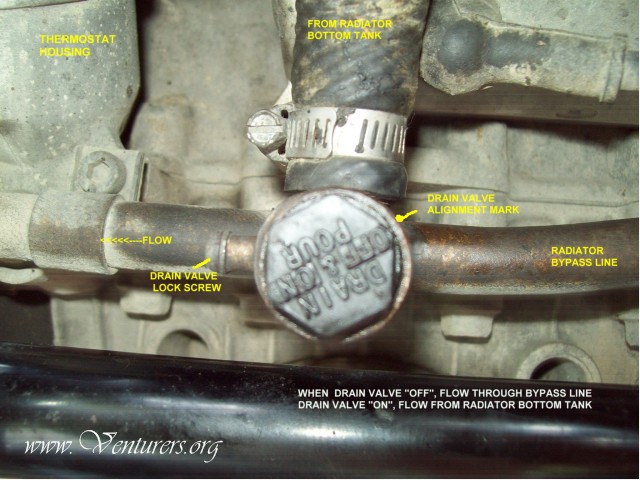
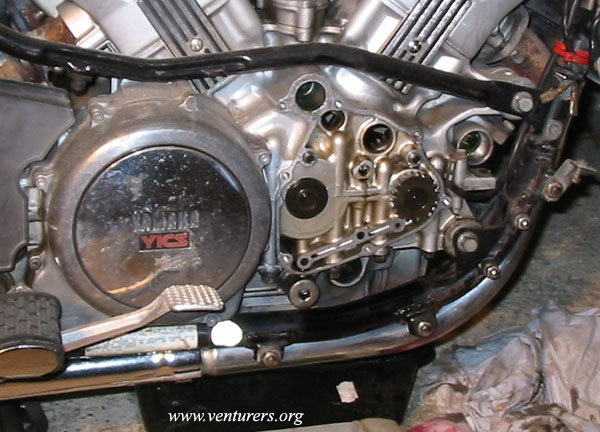
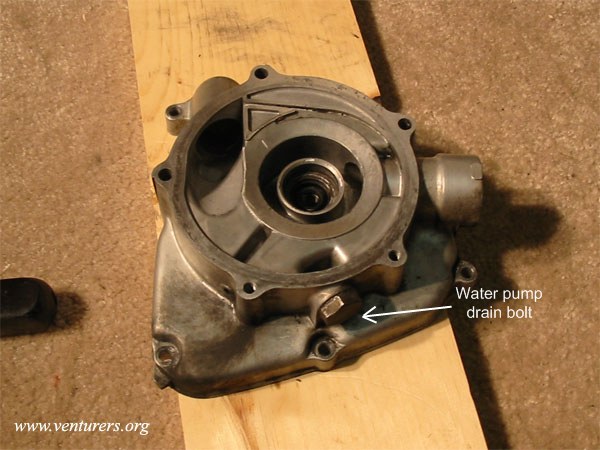
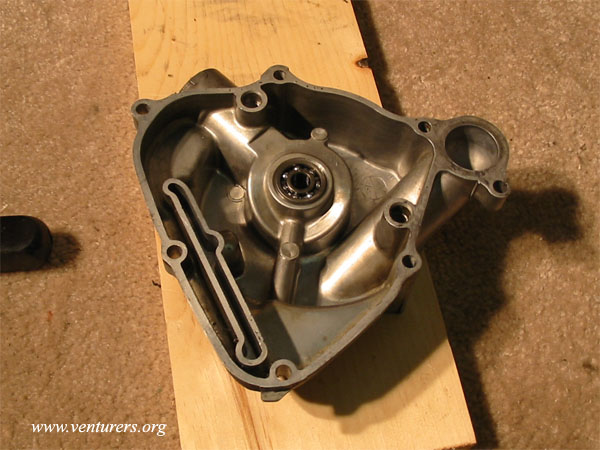
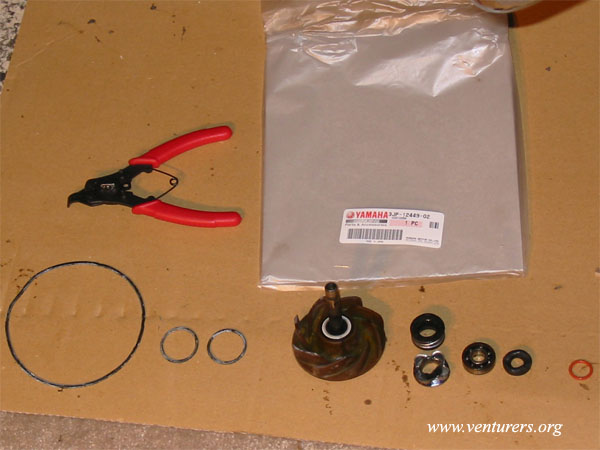
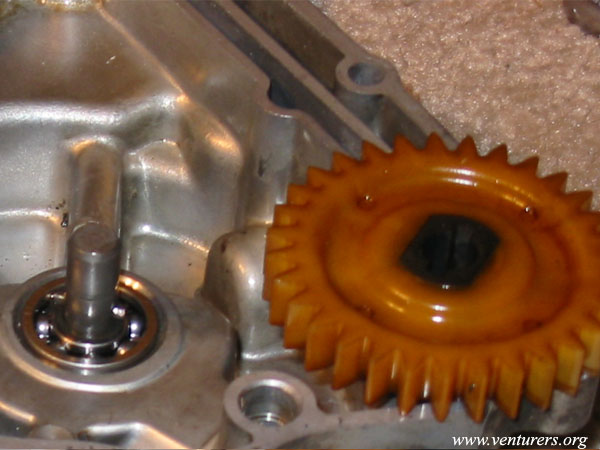
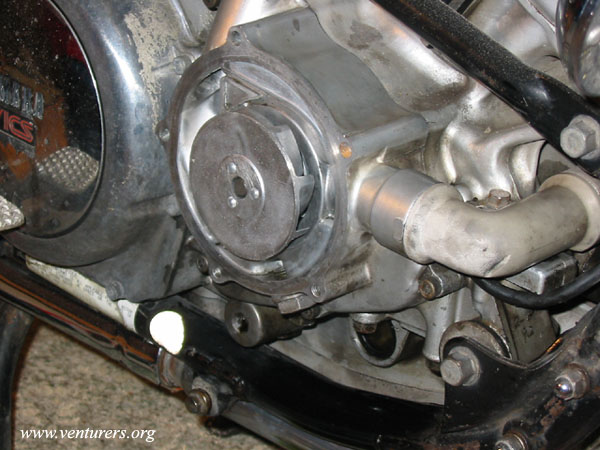
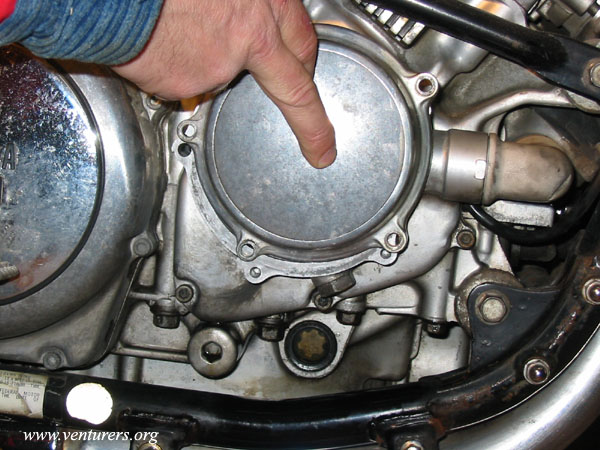
Water Pump Repair - 83 and 84 Venture The 1983, 1984 and some 1985 Ventures have a tendancy to overheat when the water pump becomes older. This is because these early Ventures were built with a plastic composite impeller which wears out. The replacement impeller is metal. This repair was done summer 2005. Place bike on centerstand. Set radiator drain cock (at bottom of radiator) to the ON position. Place a catch container under the water pump drain plug. Remove drain plug and as coolant drains, remove radiator cap. Drain Cock We have removed the fairing on this side of the Venture, exposing the water pump housing. In this photo we have now completely removed the water pump. Note that we have not drained the oil. This is the water pump housing. In disassembly, the outer cover was removed from the bike first, and the inner housing (shown here) is then removed. There are several sizes of allen bolts securing these covers, so we have set them aside noting which bolt belongs where. A view of this water pump housing from the inside. The bearing will be replaced as part of this maintenance. Showing the parts that have been removed. The small o-rings belong to the short 90 degree pipe that came off when the water pump was removed. The bearing was driven out with a screwdriver. The seal mechanism was driven out, and becomes significantly damaged during removal. That's OK, we are replacing these parts. Circlip tool is required. (the smallest o-ring does not belong to this repair - I was repairing a separate system on this Venture at the time these photos were taken) The new seal has been installed, the new bearing too. We can see the new water pump impeller is metal. We have slid the new water pump impeller in, placed the pin on the impeller (critical!), and are preparing to drop the plastic gear in place. The gear will be held in place with the new circlip. The housing is installed onto the Venture. Note that the right angle pipe is installed at the same time. This outer cover looks like it does not fit, but rotating it around will let it match up with the bolt holes. All together once again. Refill radiator(drain cock still in ON position), run engine to ensure all air pockets expelled, topping up radiator as needed. Reinstall radiator cap and then set drain cock to OFF position. Top up overflow reservoir. Check for any leaks. If all is well, reinstall fairing and any other parts removed to access water pump. Take it for a ride and enjoy that new water pump!
Edited by TAC 8/25/2009
Last update: 01:10 PM Thursday, October 15, 2009 |
| All material on webpages under the domain venturers.org, is the property of The Venturers, Inc. These materials are protected by copyright and other intellectual property laws. You may not reproduce or retransmit the materials, in whole or in part, in any manner, without the prior written consent of The Venturers, Inc. The free information contained herein is offered in the spirit of helping others and any action or advice taken from these pages is the sole responsibility of the receiver. |