|
XVZ1300TD Venture, XVZ1300TL Royale Star Venture final drive gear refit.
Never try this work without the specified Yamaha special tools, the required metrology tools and/or the skills for a good achievement.
About repair and adjustment, I think this part of our bikes is the most technical to fix. You shall understand after this " stage to stage ", why many of the Yamaha's dealers should replace the final gear as an assembly ( question of time, I've lost close to 16 hours for this work ).
For the story, I had bought this final gear assembly brand-new in winter 2005 ( 900 €, about $1260 USD ! ). During the big visit and control I made before going to Norway, I discovered :
1) An important oil leak ( half of the final gear content was gone directly in the swingarm ).
2) An important gear coupling nut backlash, showing a bearing damage.
And just after 26000 miles of service.
Descriptive of components (in removal order)
" 4 assembling nuts to swing arm
" drive shaft and its seal
" drive shaft spring
" gear coupling
" special gear coupling nut and its washer
" bearing retainer with its O ring seal and axle seal
" the gear case cover's 2 bolts and 6 nuts ( with 6 blocking washers )
" the drive shaft pinion
" the final gear housing ( with the 2 special bearings inside )
" the gear case cover, with its big O ring and the stopper bolt
" the ring gear, with its bearing and shim(s)
" adjusting shims are : back the drive shaft pinion, back the ring gear, back the stopper bolt, thrust washer for the ring gear.
The wearable parts are the drive shaft pinion and the bearings.
The tools (in metric) :
" 22mm socket
" 14mm socket
" 12mm socket
" 4mm allen socket
" two flat head screw drivers
" tightening torque wrench ( range from 0 to 80 ft/lb )
" universal bearing holder
" Yamaha's special socket for bearing retainer
" Yamaha's special final drive shaft holder
" Ring gear blocking bolt
" Dial gauge with his work-bench stand
" Final drive shaft measurement tool
" Locking agent (Loctite )
" Vernier caliper
" Feeler gauge
" Plastigage set ( range from 0,002 to 0,006 inch )
" A note pad and a pencil
Except this non-exhaustive list, we must add the following Yamaha spare parts :
" ring gear shims : 0.25, 0.30, 0.35, 0.40, 0.50 mm
" stopper bolt shims ( 5 x 0.20 mm )
" ring gear thrust washers 1.20, 1.40, 1.60, 1.80 et 2.00 mm
" gear coupling self-locking nut
Process:
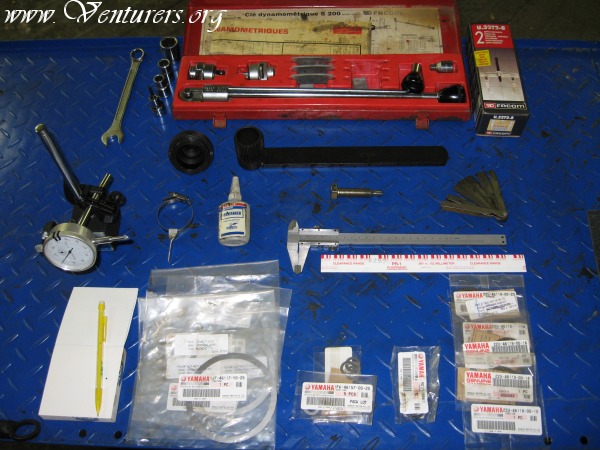
On this view, we can see the necessary tools, to repair or adjust the final drive assembly. On top, the basic tools of a good work-shop: wrenches and metric sockets, the tightening torque wrench, the universal bearing holder. Just under, the Yamaha special tools : the bearing retainer socket, the coupling gear wrench and the ring gear blocking nut (downward). Just bottom, the dial gauge (who's like a clock), the final drive shaft measurement tool, the locking agent's can, the caliper (metric) and the feeler gauge (metric), the Plastigage set just downward. Bottom lane, left to right: Note pad, ring gear shims, stopper bolt shims, gear coupling self-locking nut, ring gear thrust washers.
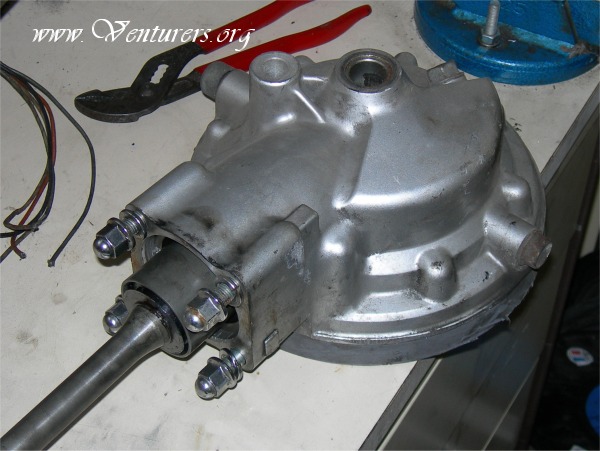
The first stage is to remove the rear wheel. With a 14 mm wrench, remove the 4 chromed nuts (who join the final gear to the swing arm). Simply pull out the assembly, the drive shaft (left side), come together. Don't forget to unplug the speed sensor, for the 2nd gen bikes.
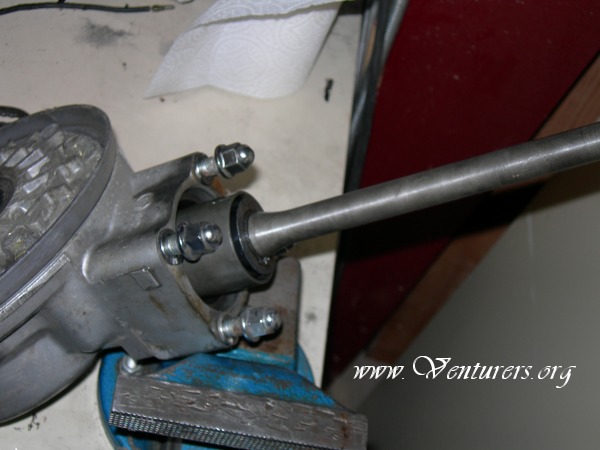
On this other view, we see the chromed nuts and the drive shaft. This last one is connected to the coupling gear (visible here). There's an oil seal between both. We must pull firmly the shaft to disconnect it. Don't forget the little spring in the shaft backside. The oil seal stay on the shaft.
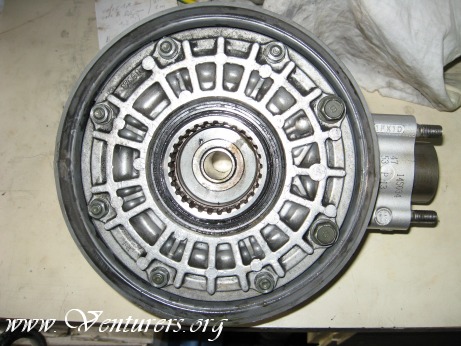
Wheel side view, we can see the 2 bolts (right side, to unscrew with a 14 mm wrench) and the 6 nuts, and their blocking washers (12 mm wrench). Unscrew them quarter by quarter of turn, in crisscross pattern (like a wheel car). To remove the gear case cover, we use 2 flat head screw drivers, diametrically (in the drive shaft direction) as levers, and we pull it out gently. Be careful of the contact surfaces on both parts (machined surfaces).
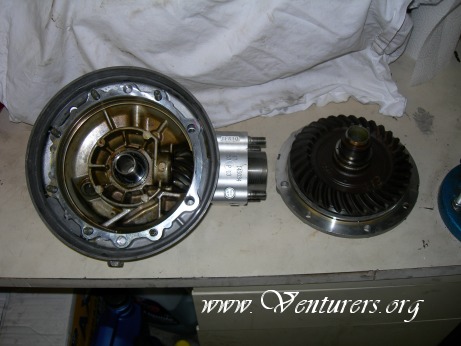
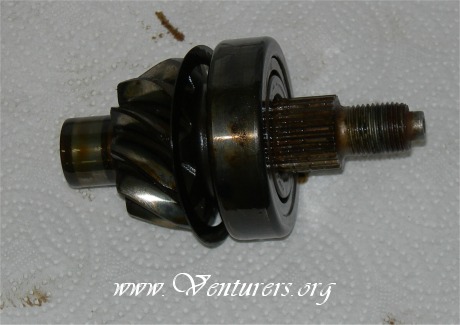
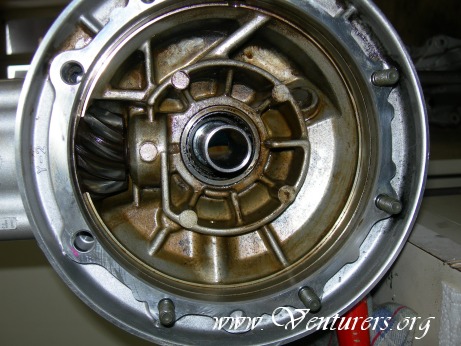
The "thing " is open. Left to right: the gear housing, with its grey plastic dust cover (perimeter), pinion on the right side, the gear case cover with the ring gear and its shim. We put the last apart for the moment.
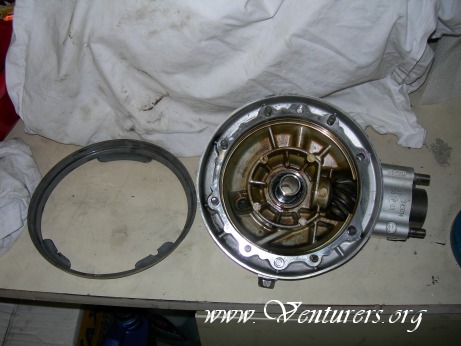
We simply remove the dust cover.
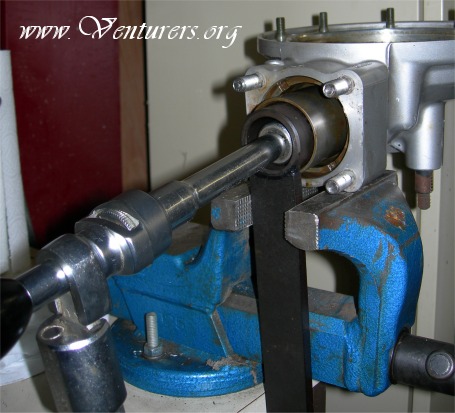
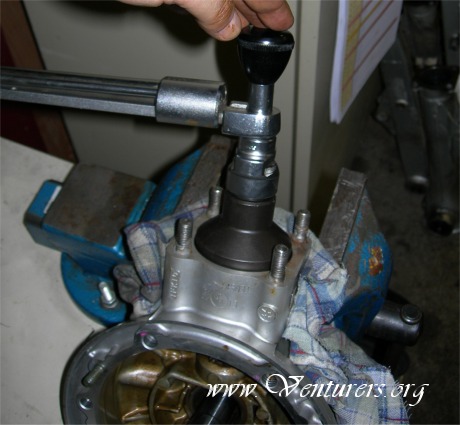
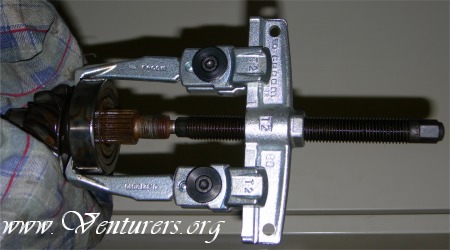
Now become the serious part of the job : the first one consists to change pinion's bearing and oil seal. For that, we use the Yamaha final drive shaft holder, and a 22 mm socket with wrench. The nut is blocked really efficiently, so we put the assembly in a vice. All is in place for the unscrewing (normal wise, invert clock wise). From left to right: the 22 mm socket and its wrench (with a nice extension, to work efficiently), the Yamaha final drive shaft holder (in the vice) the coupling gear connected on, and the gear housing.
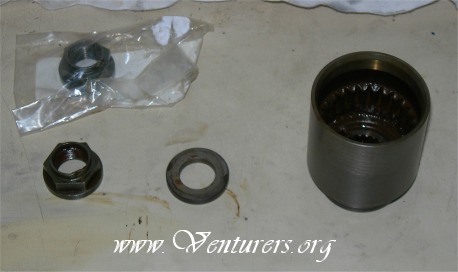
After removal, from left to right : the locking nut (the new one on its top), its washer and the coupling gear.
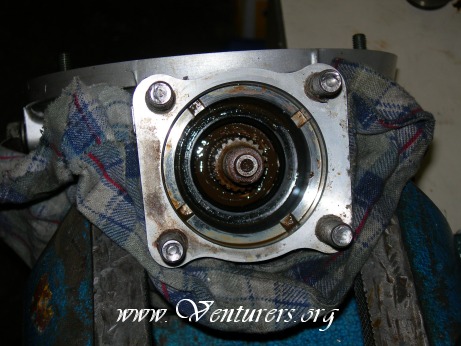
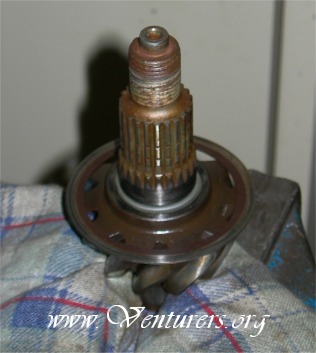
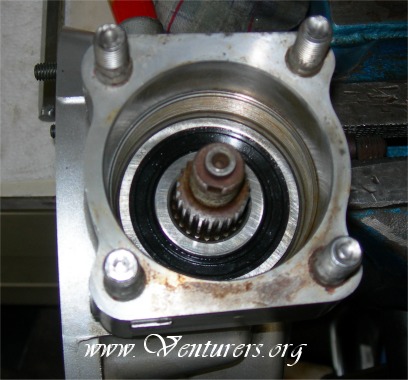
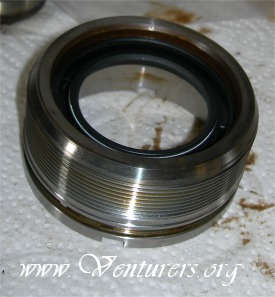
On the gear housing, we can see, from outside to inside : the 4 swing arm mounting bolts, the bearing retainer and its 4 notches, the oil seal (really " oily "), the pinion's axle.
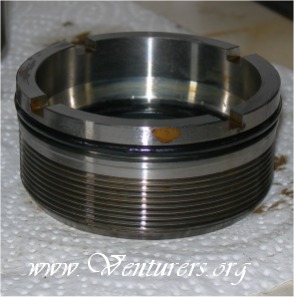
We must now remove the pinion. For that, it's necessary to remove the bearing retainer with the help of the Yamaha special socket. The tools are in place, ready for the removal, unscrew by turning clock wise. (Left-hand threads!)
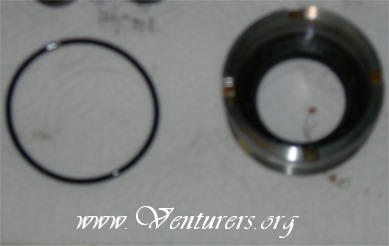
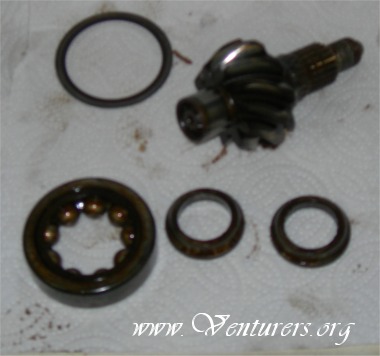
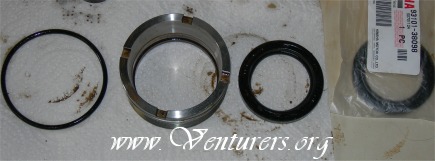
The removed parts : left side, the bearing retainer's O ring, right side, the bearing retainer and its oil seal in the centre (sorry for the poorness of this picture).
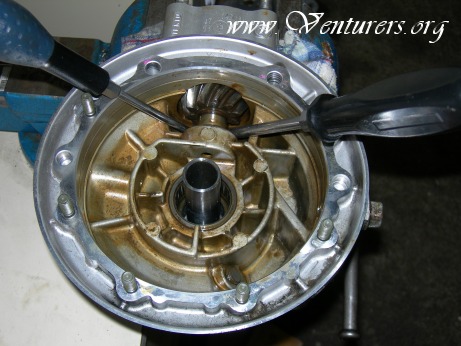
With the help of the 2 screw drivers, we pull out gently the pinion. We can see in the centre the ring gear's central bearing.
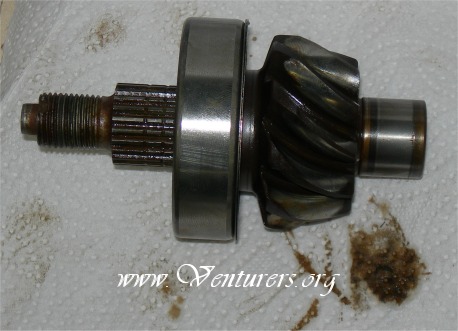
The pinion is outside. From left to right: the bearing runway, the gear, the thrust washer, the bearing, and the coupling splines.
The thrust washer is not changed: It's calculated with the gear housing, gear case cover, ring gear and pinion's appropriate rectification tolerances (making it as a complete assembly).
It would be change only if one (or more) of the internal parts must be change (internal bearings, ring gear, pinion or gear cases). It's not our case, the bearing to be changed staying outside the match mounting.
The universal bearing holder is in place, ready for the removal.
After removal : on the top, the thrust washer (we conserve it preciously) the nude pinion, bottom the bearing and its particular central runway, in 2 parts.
We jump directly to the rebuilding : pinion is in place on the vice, and the thrust washer too.
After the new bearing installing, from left to right : the coupling splines, the new bearing, the thrust washer, the gear and the internal bearing runway.
This little assembly is pushed inside the gear housing, gently, in paying attention that the thrust washer and the bearing are well in place.
Inside, the pinion is well placed, in the depth of its housing. Mounting with lots of gear oil, please, especially for the bearings (inside and outside).
The bearing retainer must be prepared. Here the old O ring is remove, the new seals can be put on it now.
Inside view from the bearing retainer : the oil seal is in place (notice the oil seal's spring is placed inside, face to face to the bearing).
Outside view of the bearing retainer : the new O ring is in place (here on the top of the part).
Article continued on Page 2
10/29/2007
Last update: 08:18 PM Sunday, November 4, 2007
|
