|
So much has been written and discussed about the clutch whine, the clutch baskets, straight cut gears. I took some pictures while removing my clutch basket. I know a lot of Venturers do their own work. But for the sake of the less mechanically inclined among us, I thought these pictures would explain a lot. Also, anyone who thinks about servicing their clutch can benefit from these pictures. And anyone who goes to a dealer to get a noisy whine fixed, might want to know exactly what's involved in trying to fix it. Total time to remove and replace is about 1 hour. ( These pictures are for information only. Don't hold me resposible if it doesn't work for you.)
----------------
It's a 2001 Royal Star Venture, but all Venture clutches '86 to '93 look like this. The '83 to '85 have 6 coil springs under the 6 bolts, instead of the diafram type spring of all the others.
-----------------------------
The starting point, the clutch cover
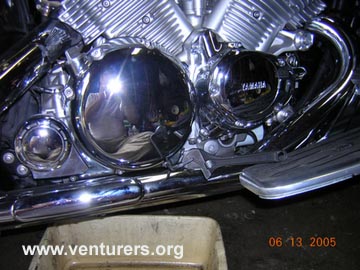
--------------------------
The clutch cover removed
----------------------------
remove 6 bolts and the spring retaining ring
-------------------------------
lift off the spring and the pressure plate
---------------------------------
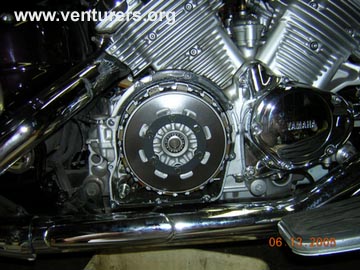
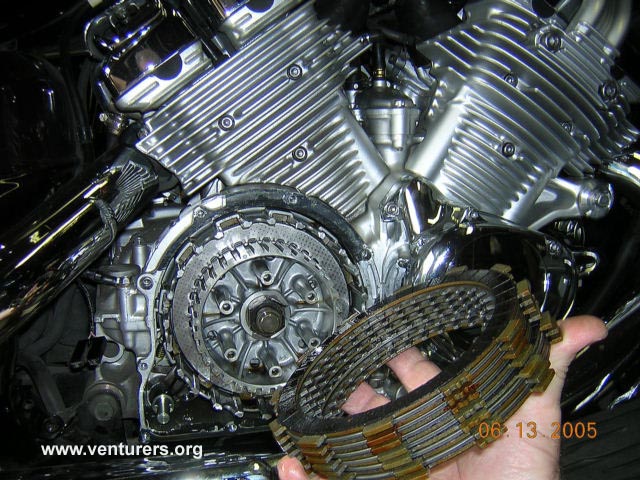
Then the friction plates and the steel plates can be removed. Keep them in order. Notice the friction plates have tabs. One of the tabs has 2 notches in it. (facing the camera) It's for alignment.
--------------------------------
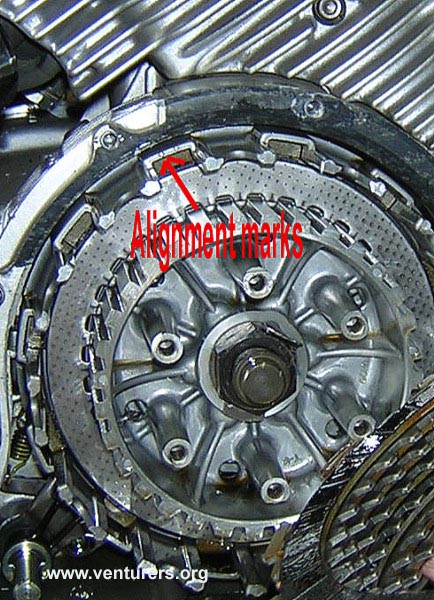
The clutch basket has 2 dots on the edge. Align the notches in the friction plate tabs with the alignment marks when you put them back in. If you're just replacing worn friction plates and clutch spring, this is as far as you have to go.
---------------------------
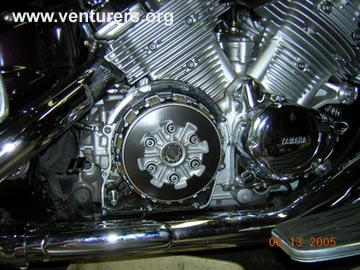
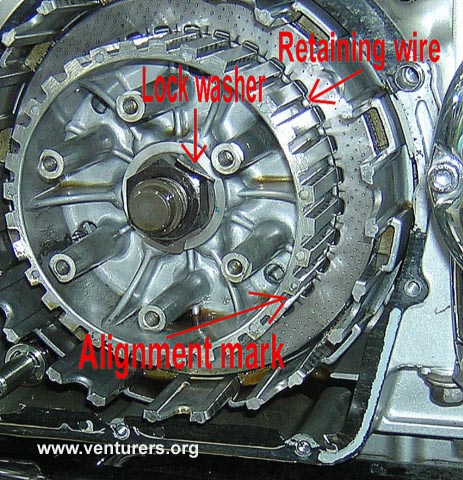
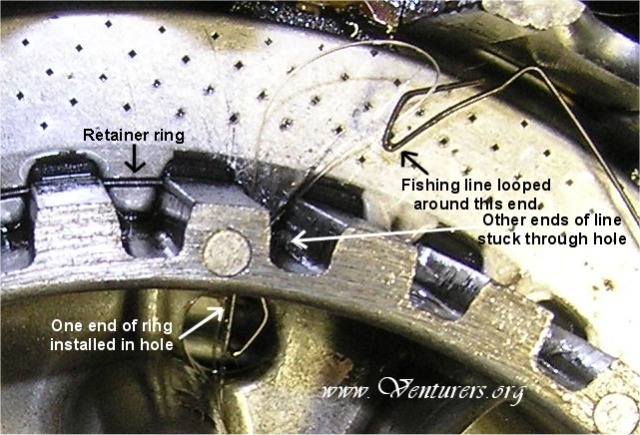
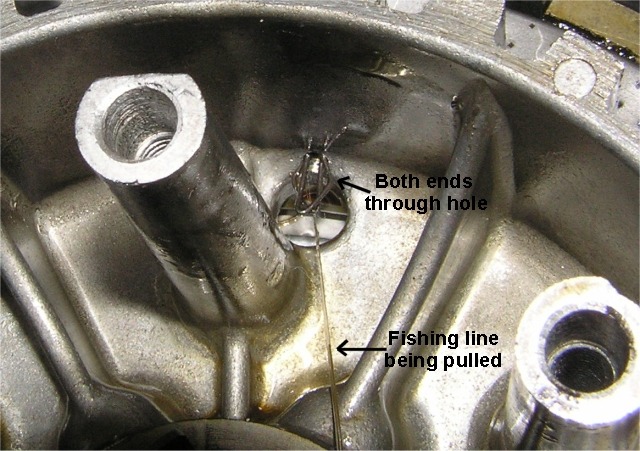
You can't remove the inner 2 plate because there is a retaining wire holding the last 2 plates (one steel plate that you can see, another friction plate behind it.) The retaining wire can be removed to get the last 2 plates out. The ends of the wire go into a hole, from the outside, in. (The ends are bent to look like arrows.) See update at end of article.
Arrows show locking tab on the nut, and another alignment mark, to align the punch mark on the pressure plate (when you put the pressure plate back on)
---------------------------------
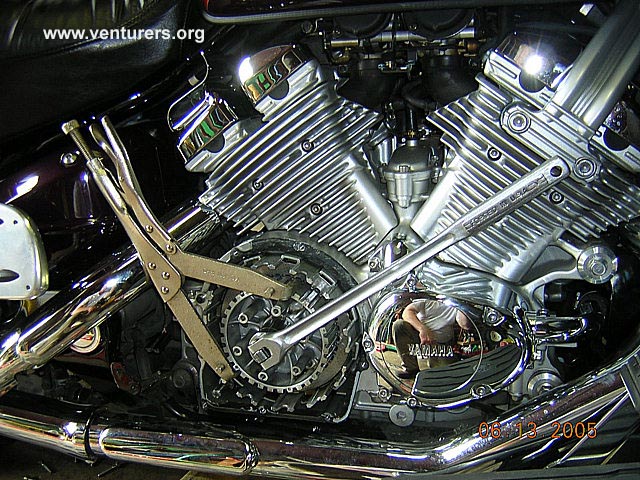
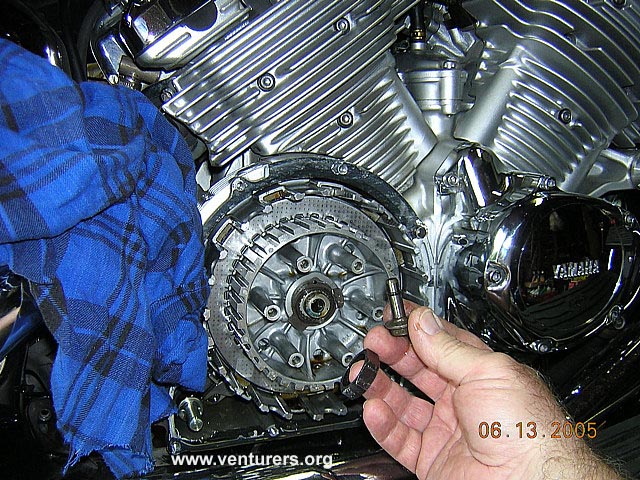
The special tool to hold the clutch so you can loosen the nut. The inner part that the tool is holding rotates along with the nut, so you have to hold it from turning.
-----------------------------------
The short clutch push rod pulls right out. Remember to put it back in before you put the pressure plate in place when re-assembling.
--------------------------------
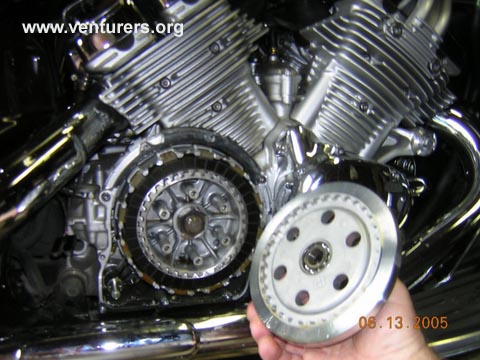
The inner part of the clutch, the "clutch boss" then can be removed.
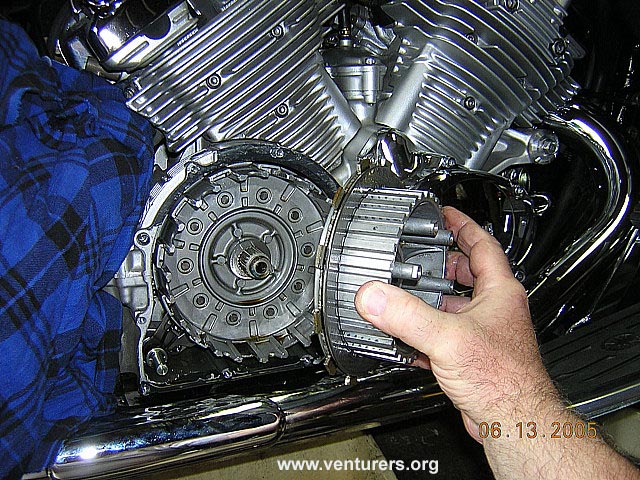
-------------------------------
Here's the clutch basket being removed
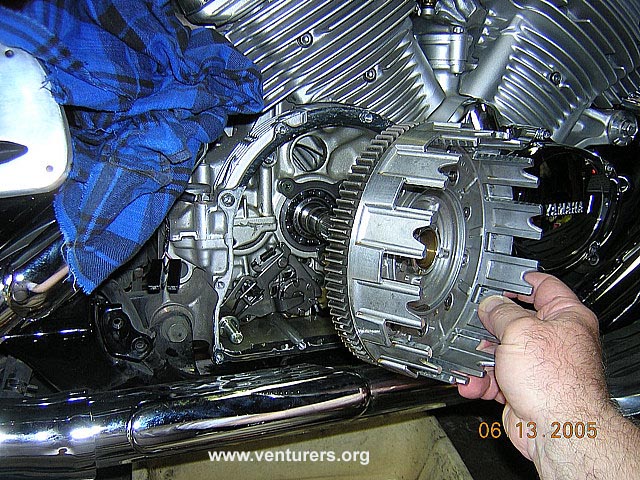
-----------------------------
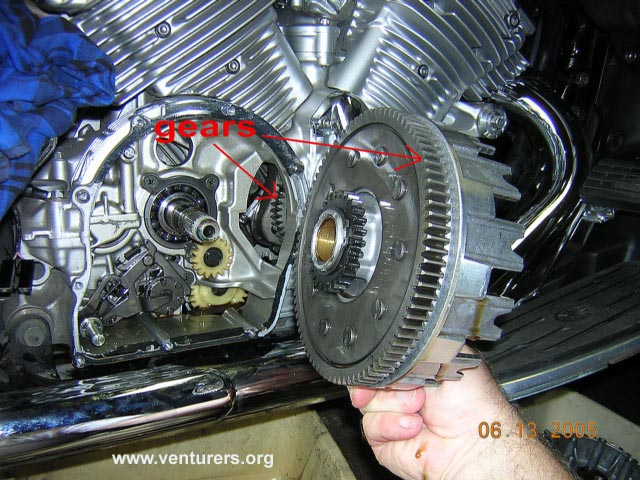
And here's where the "WHINE" comes from. Straight cut gears. Some mesh too tight (?) causing the whine to be loud. (maybe) Some mesh tighter at one point as they turn, causing the "chirp". (maybe). And some make hardly any noise at all.
_________________
Denden Venturer # 72
'83 Venture Standard- Burgundy
'01 Royal Star Venture- Red/Bordeaux
Dennis.Ya forgot about checking the little ball bearing that sets on the inboard end of that clutch shaft for damage and how ya DON'T wanna lose it LOL!! Dave!!!
_________________
Venturer #179
And I forgot to ad, I did this with the bike on the sidestand. So I didn't have to drain the oil. All the oil went to the other side.
Yeah, Dave, I've chased that little ball bearing across the garage floor on my hands and knees.
_________________
Denden Venturer # 72
'83 Venture Standard- Burgundy
'01 Royal Star Venture- Red/Bordeaux
Little repair cheat here:
When doing clutch work on my last bike (Kawasaki ZL1000), I stuck a magnetic pick-up tool onto the clutch pushrod (1 long one on the Kaw, "Pushrod No. 2" on the RSV) and it pulled the ball bearing out with pushrod, preventing that runaway effect of a metal ball bouncing along the concrete garage floor into places unknown.
_________________
Dave
Update by TN Tim:
To get to the last two clutch plates (one fiber and one steel) remove the wire ring with a small pic or screw driver. Squeazing the ends a little with some needle nose pliers will make the wire ring come out easier. The last friction plate has a little smaller inside diameter than all the others and has a spring plate that fits inside it. Pay attention to which way this plate comes out and reinstall it the same way. It should be marked "outside" on the side facing out, but this may be difficult to see.
Reinstalling the wire ring can be difficult. I used a piece of fishing line looped around the end of the ring to pull it back through the hole while pushing it down from the top side at the same time. See pics below.
Last update: 10:10 AM Saturday, April 7, 2007
|
